Input field error tracking in Google Analytics 4 and Google Tag Manager
Understanding your website form performance can give you valuable insights into potential bottlenecks that prevent potential customers from completing them. This information can provide additional ideas on how to improve the application or sign-up process. Input field error frequency could be one of the indicators to show if users are struggling with any part of the form.
In this post, we will take a look at how to set up input field error tracking in Google Analytics 4 and GTM, and how to view collected data afterward.
We will tackle a specific tracking problem of input fields that are using a default HTML client-side validation method.

By default, if a field doesn’t meet the requirements, the error text is shown as a small popup, without adding any DOM element that could potentially be used with a visibility trigger. This creates a small problem since there is no default trigger in Google Tag Manager that can activate a tag on these events.
To add necessary tracking we will be utilizing Constraint Validation API and dataLayer events that I will show you in the examples below.
Client-side field error tracking template
We will be using a code template to capture client-side input field validation errors, so you can copy that and add it to your custom HTML tag. It should work in the majority of cases, and I will explain what this code does in a second.
<script>
  (function(){

    var inputs = document.querySelectorAll("input");

    for(var i=0; i <= inputs.length - 1; i++) {
      if(inputs[i].validationMessage !== "") {

        window.dataLayer.push({
          "event": "fieldError",
          "fieldName": inputs[i].getAttribute("name"),
          "errorMessage": inputs[i].validationMessage
        });

      }
    }

  })();
</script>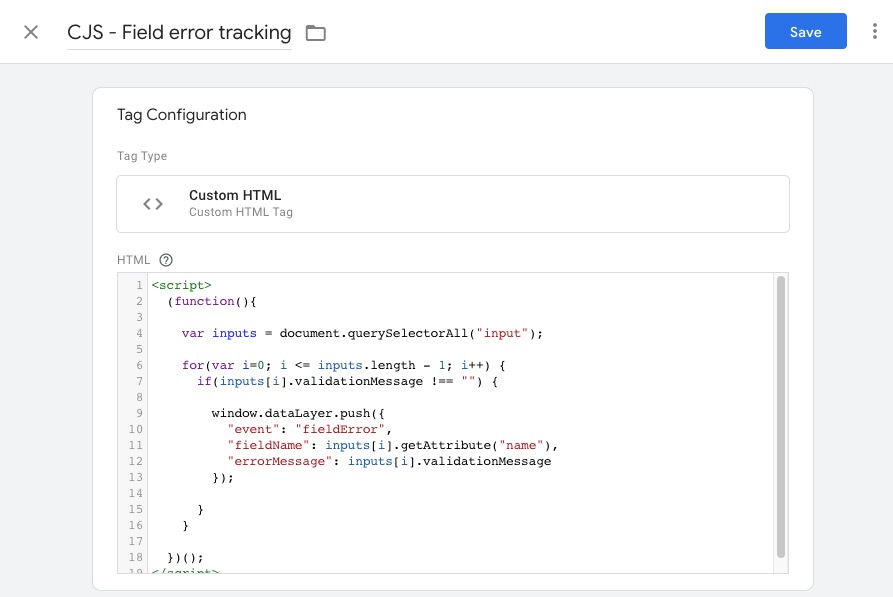
Next, you need to add a trigger when a user tries to submit the form. Usually, these errors are shown when you click on a submit button, so we can use that element.
- Create a new trigger with type “Click – All Elements”
- Add a CSS selector for your submit button
In my example, it will be a simple button[type=”submit”] selector.
Check this article explaining CSS selectors in GTM if you would like to learn more.
- Add additional conditions to filter out specific forms or pages.
It might be useful to limit a trigger to a particular page. If your website has multiple forms, you can control where errors are collected from.
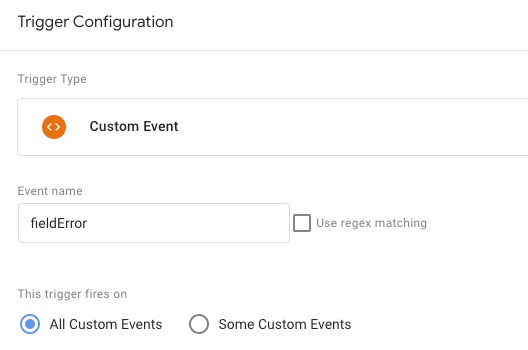
Your final trigger configuration will look similar to this:
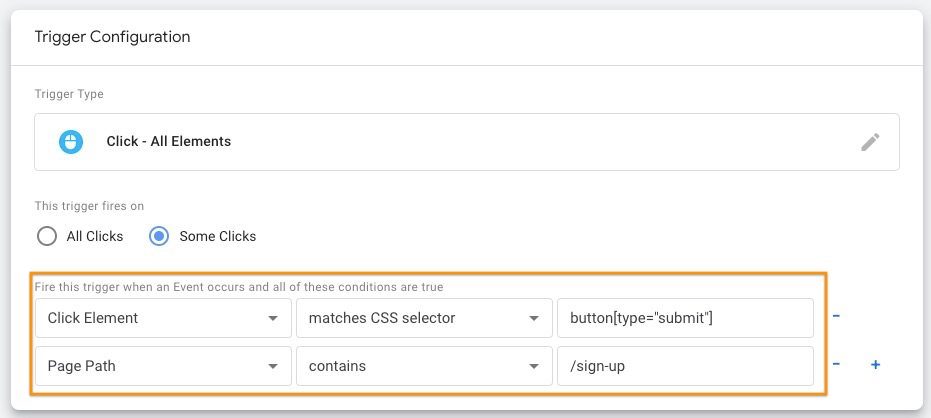
Once you save the trigger, and your tag, a dataLayer event “fieldError” will be sent for each validation error shown to the user.
Code snippet explanation
Let’s take a quick look at what the code does line by line before we finalize Google Analytics event setup.
First, we extract all <input> elements from the page:
var inputs = document.querySelectorAll("input");Then, for each input field, we are checking if there are any validation errors by using .validationMessage using Constraint Validation API.
for(var i=0; i <= inputs.length - 1; i++) {
    if(inputs[i].validationMessage !== "") {
If the validation message isn’t empty it means this field had an error. In this case, we send a dataLayer event “fieldError”. It contains 2 additional parameters:
- fieldName – it will get input “name” attribute from the code and pass it to dataLayer
- errorMessage – it will contain the exact error message text that was triggered or visible
window.dataLayer.push({
  "event": "fieldError",
  "fieldName": inputs[i].getAttribute("name"),
  "errorMessage": inputs[i].validationMessage
});
Adding a Google Analytics 4 event tag
Once we have the code template in place we will have dataLayer available, but it still won’t reach Google Analytics until we create a tag for that.
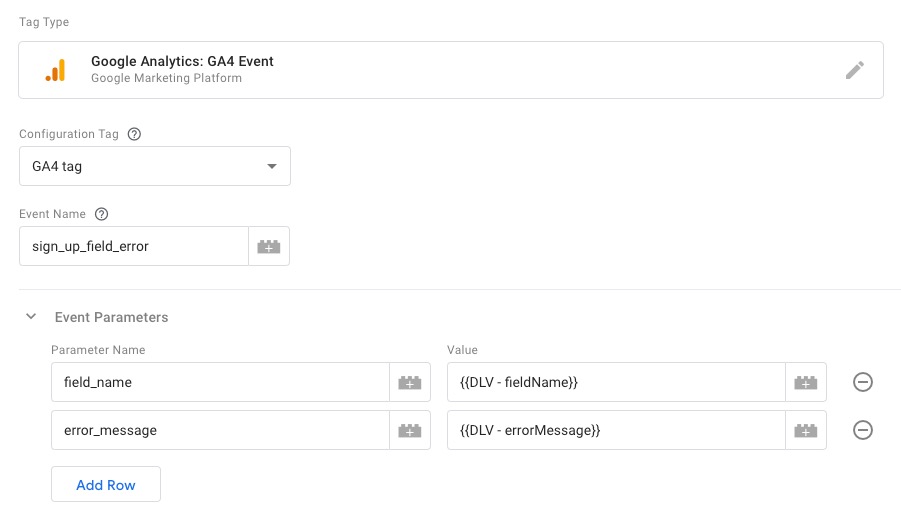
Create a new tag with the type “Google Analytics: GA4 Event”, select the GA4 configuration tag, and provide the event name that you want to see in your reports. In my case, I will use “signup_field_error”.
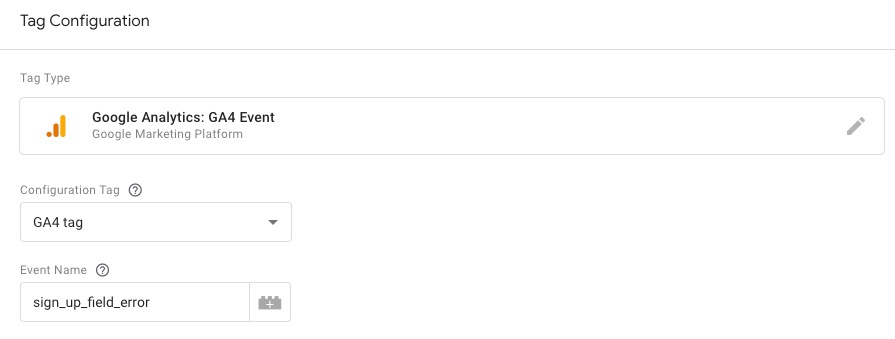
To collect field name and exact error message text we need to add event parameters using dataLayer that we have just added in a custom HTML tag.
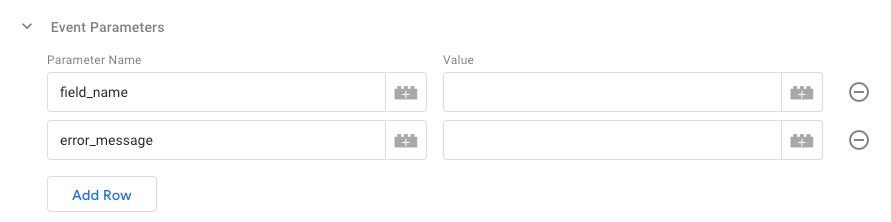
Under the event parameters section add 2 parameters:
- field_name
- error_message
Of course, you can use different names here, just be sure to align it with custom dimensions names in Google Analytics 4.
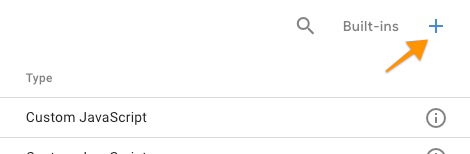
As field values we will use dataLayer contents, so click on the plus sign near the value input field and create a new variable by clicking on a “+” icon once again.

- From the variable type select “Data Layer variable” and the variable name will be “fieldName”
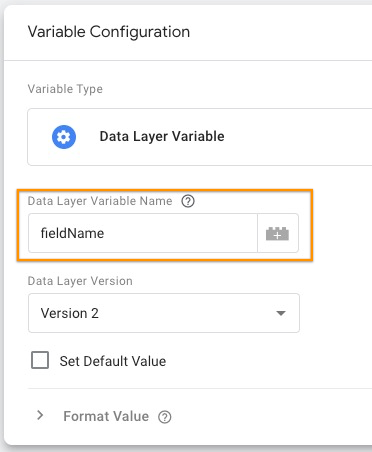
Save the variable and do the same for the error message. The data Layer variable name will be “errorMessage”.
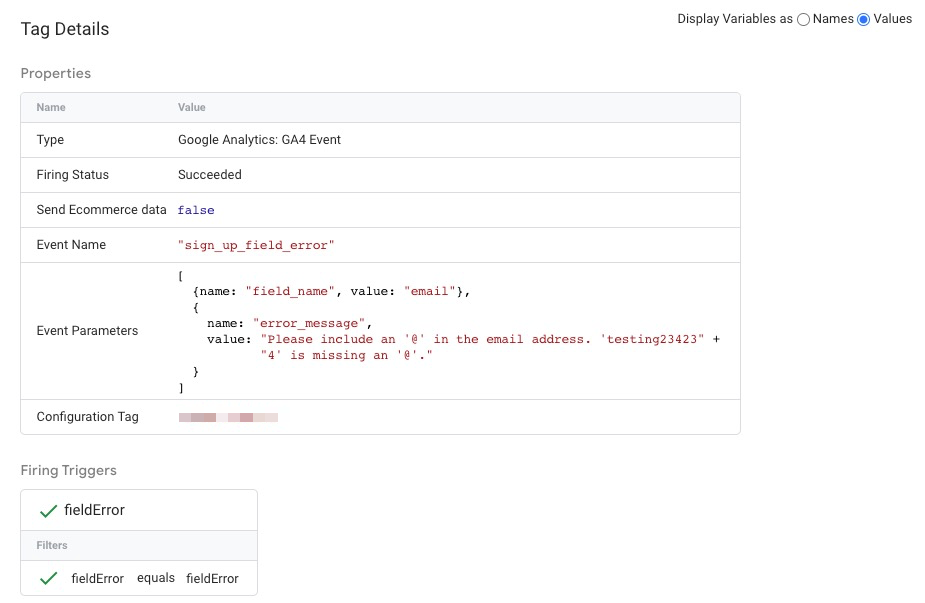
Your final event should look similar to this:
Now we only need to add a trigger that will be a custom event from the same data layer, named “fieldError”.
Each time fieldError event will reach the data layer we will send a GA4 event with dynamic information about the field name and error text. Save your tag, and now we only need to register event parameters in Google Analytics before we can test it.
Before we proceed, we have to create additional custom dimensions for additional event parameters or parameter values won’t be stored in Google Analytics 4.
Add custom dimensions in Google Analytics 4
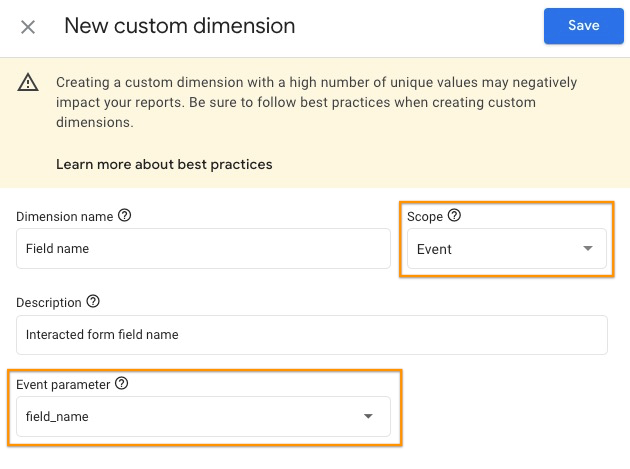
Open Admin section in your Google Analytics account and under the GA4 property select “Custom definitions”. Then create a new custom dimension.

Then create 2 event-scoped dimensions using exactly the same event parameter values from our GTM tag:
- field_name
- error_message
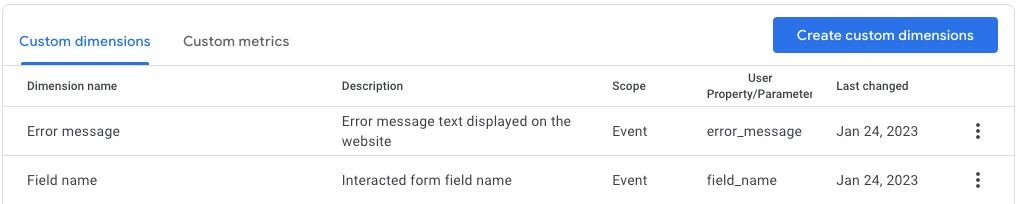
Once you are ready you should see them in the custom dimension list. Now, we are ready to test the error tracking implementation in GTM.
Testing event
To test implementation enable GTM preview & debug mode and then try to submit an empty form or provide incorrectly formatted data to trigger a default error message.

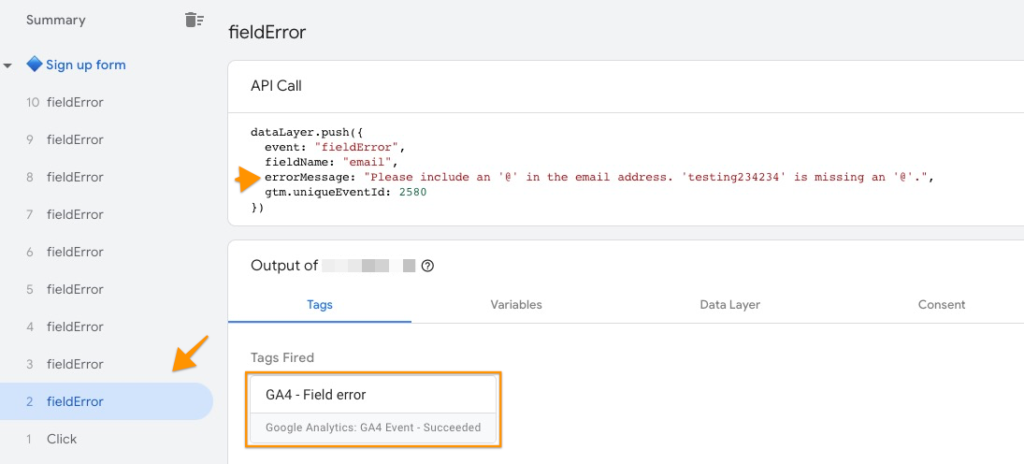
For each field error (even if it’s not directly visible on the page) you should see a “fieldError” event in the tag assistant window. By clicking on the event and expanding dataLayer contents you should see the correct field name and error text. The same should be visible in your GA4 event tag when you click on it:
You can also double-check the setup in GA4 DebugView to make sure events are passing through the correct information. If all events have expected field and error message values – Publish your changes from GTM and start collecting error messages.
Common issues and possible solutions:
- No “fieldError” event in the data layer
Double-check if Custom JS tag is firing, there might be an issue with the button click trigger, in case form is sent on another button click that doesn’t have the type “submit”. If so, you will need to adjust the CSS selector for the GTM trigger.
- I don’t see a full error message text in the reports
If your error messages are longer than 100 characters GA4 will cut all text that exceeds that limit. It would happen due to event parameter length limitations. If this is an issue for you, error messages could be grouped using RegExp or Lookup tables with shorter output.
- Incorrect or empty field name
If data layer doesn’t report the correct field name for error message – double-check if your fields have a “name” parameter. If you don’t have it, search for a replacement attribute that can be used (ID, class name, other parameters). Then you need to replace it in the code with your custom value instead of “name” – inputs[i].getAttribute(“name”);
- Select dropdowns are not tracked
If you have default validation enabled for <select> fields, to include those in dataLayer just edit the first line CSS selector from “input” to “input , select”. This should fetch <select> field validation errors as well.
Analyze field error events in Google Analytics 4
To see what error messages users experience on your form and what are the most problematic fields you can create a simple Exploration report inside GA4.
- Open the “Explore” section from the main left menu and create a new empty Exploration.
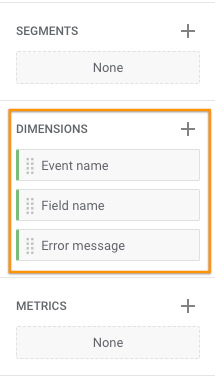
- From the dimension list select: Event name, Field name, Error message.
Field name and Error message can differ depending on how you named your custom dimensions in Google Analytics.
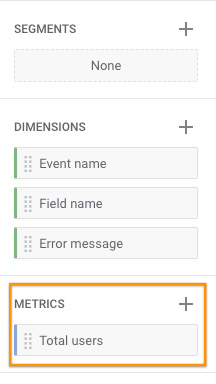
From metrics select Total Users. If you would like to see something else, just add them to the list in the same way.
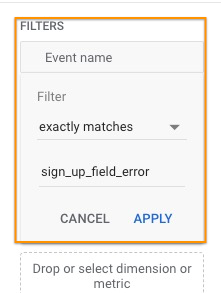
Next, in the Tab Settings scroll down to the Filters section and select “Event name” as our filter. We will include only sign_up_field_error event.
Now, we only need to double-click on all necessary metrics and dimensions to display them in a report.
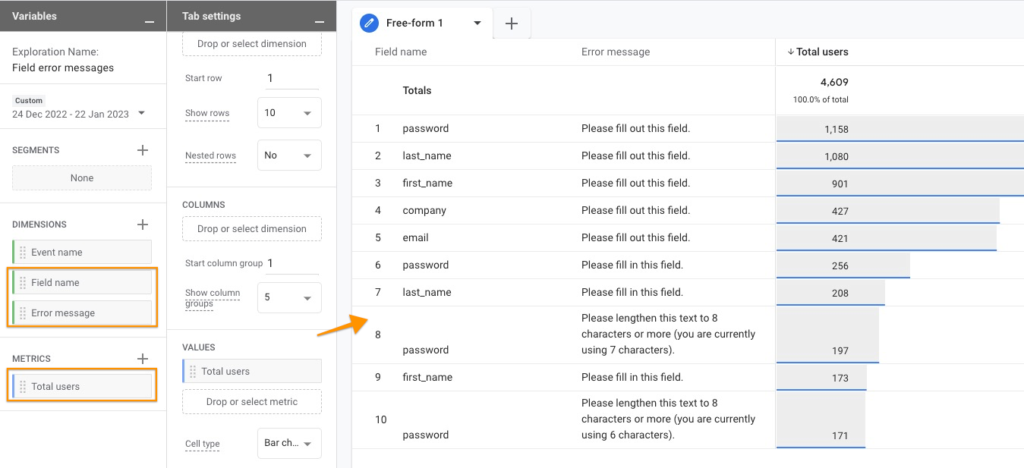
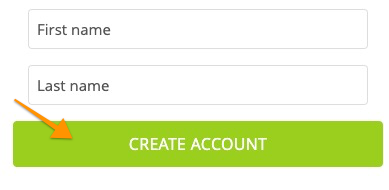
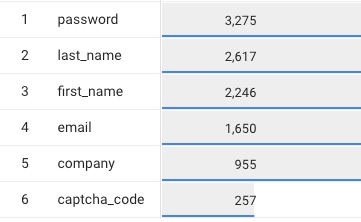
Based on this data we could quickly see that for some reason biggest issues are with filling out First name, Last name and Password. We can also group it in a separate tab to display aggregated data only for field names:
Summary
As you can see, using Constraint validation API and provided template it’s relatively easy to collect insights about errors that customers are experiencing while filling out your form. You can easily adjust it if needed to fit your specific implementation (e.g. if you would like to group error messages or include additional field parameters).
Note that this code covers only default client-side validation errors. If your forms are using other ways of displaying a validation error you might need to use another approach such as custom dataLayer implementation on the website, visibility trigger, or custom DOM scraper to get this data.
I hope you found this useful, and as always, let me know in the comments if you have any questions!

hey 🙂
I have a problem with an event fieldError – is called even for correctly filled fields. I feel like it’s duplicating. do you maybe have an idea what is the reason for this ? Thanks
Hi Kamil,
You need to double-check your CSS selector, probably it’s not unique for the error messages & fields with errors.