
Read and write cookies in GTM
Let’s take a look at how we can read or write cookies in GTM as it often might be useful to extract additional information and pass it as a dynamic parameter to one of your tags. From time to time you might also need to save a customer or a session state between page views so that it can be used in GTM later.
How to read cookie values in GTM
Reading cookie value in Tag Manager is relatively easy if you know the name.
To check what cookies and data are available for you on the website, and for that, we need to take a look in the browser console.
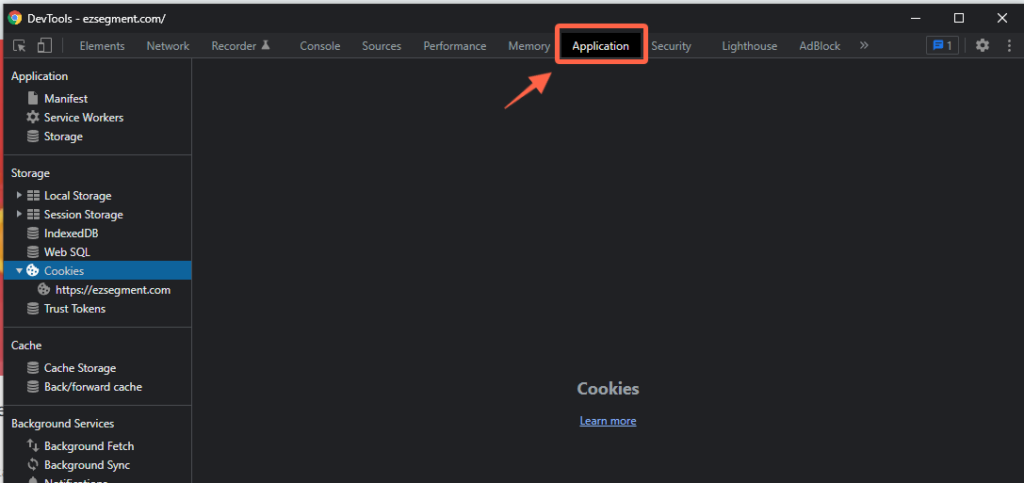
If you’re using Chrome or Edge, open your website and press Ctrl + Shift + I (⌘ + Shift + I on mac) to open a console. You can also right-click and select “Inspect”.
In other browsers hotkeys might be different (e.g. Ctrl + Shift + J (⌘ + Shift + J on mac) on Firefox).
An additional window will pop up (the console) and here you need to select “Application”.
Click on your domain name under the Cookies section and you should see a list of all your cookies and their values.
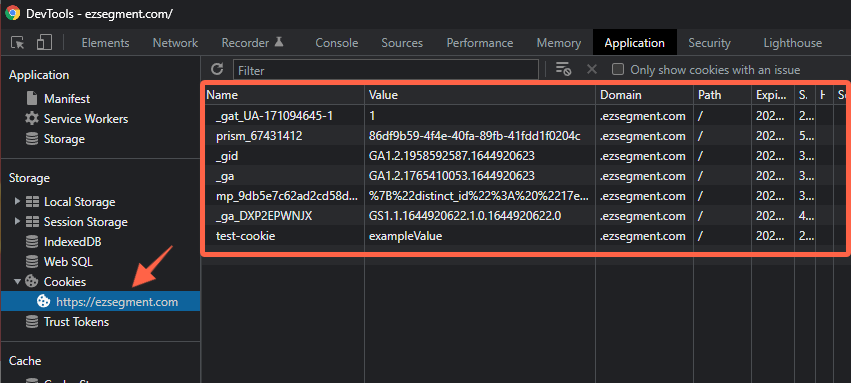
You can use it just to double-check what cookies and values are available to you in different scenarios. In GTM we can extract only 1st party cookies, meaning that you can get the value of cookies that have your domain in the 3rd (Domain) column.
I will use “test-cookie” for my example, and head-on into GTM, where we need to create a new User-Defined variable.
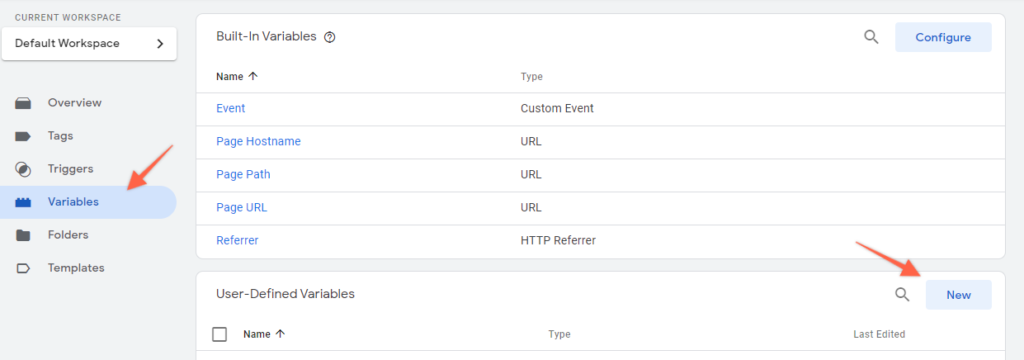
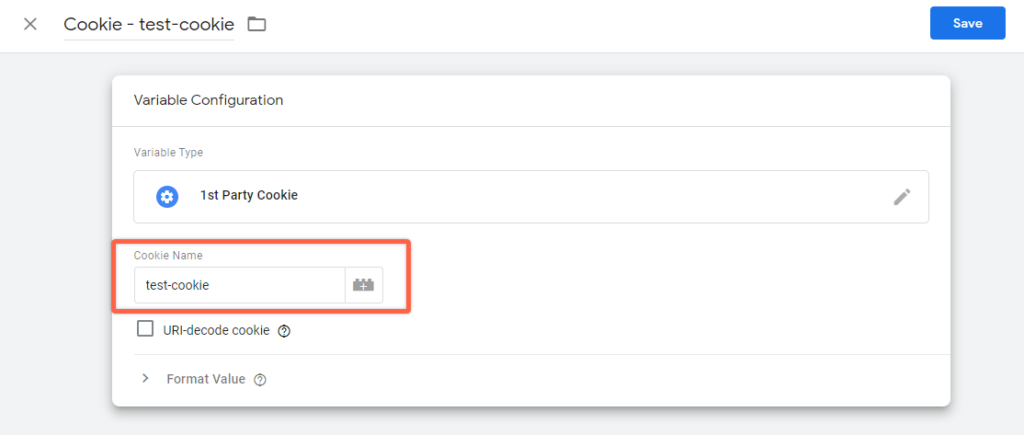
From variable configuration select “1st Party Cookie”
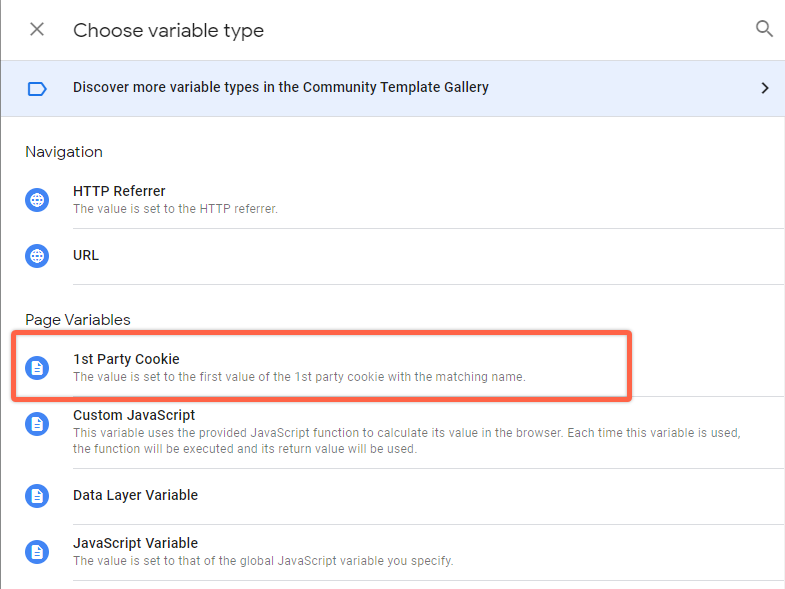
Cookie Name should contain your cookie name, in my case, it was “test-cookie”. Note that this name will be case sensitive so it should exactly match the value that you see in the console.
Transform cookie values
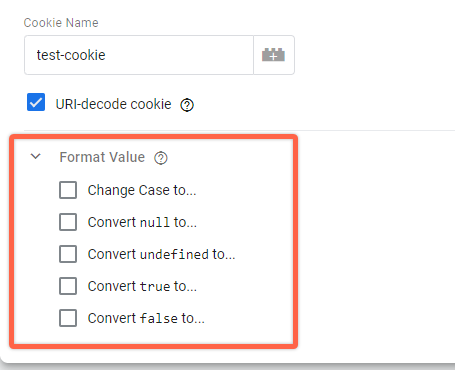
If your cookie contains URL-encoded values (where special symbols are converted to URL-friendly strings), then you can select the “URI-decode cookie” checkbox to decode cookie value.
For example, if your cookie contains the following encoded value:
%7B%22%24device_id%22%3A%20%2217ed080cd8f40b-0f27cd54d8cb15-576153e-1fa400-17ed080cd901037%22%2C%22%24search_engine%22%3A%20%22google%22%7D
Then with the checkbox enabled it will become:
{"$device_id": "17ed080cd8f40b-0f27cd54d8cb15-576153e-1fa400-17ed080cd901037","$search_engine": "google"}
Also, as in many custom variable types, we have an option to transform extracted values.
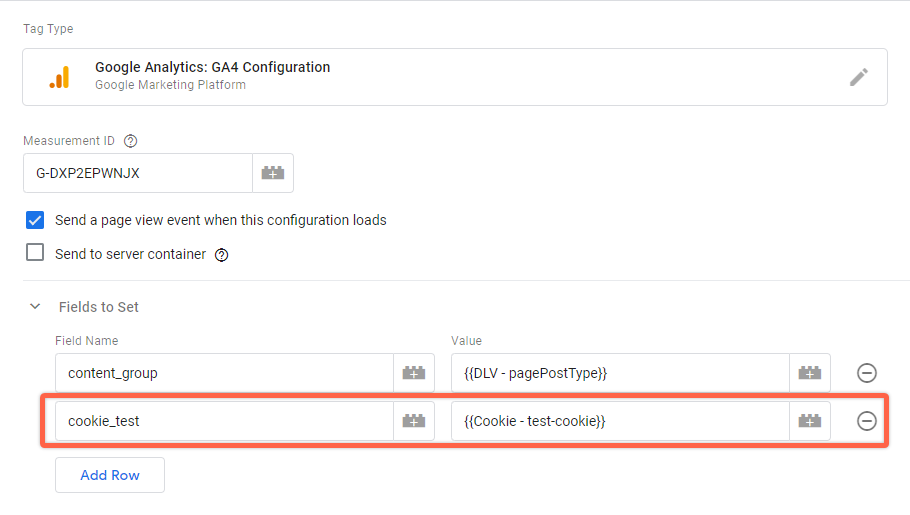
When you are ready, save the variable, and now you can use it in your tags like any other custom variable. For example, you could send it as a custom dimension to GA4.
Verify extracted cookie in GTM preview mode
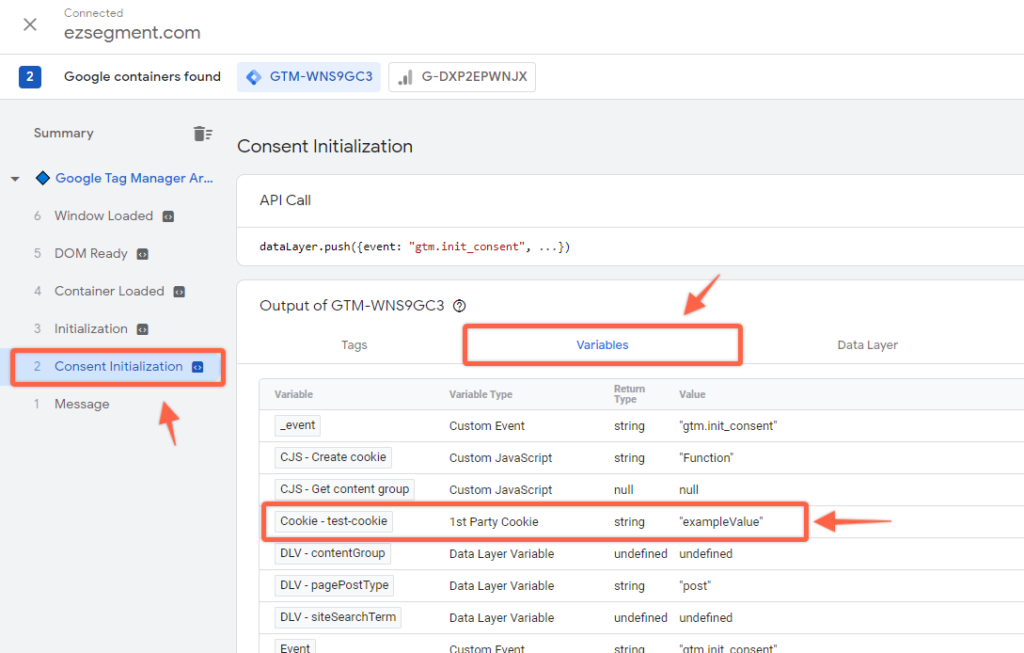
To check if you are getting expected results, preview your container and double-check if you are getting expected values under the “Variables” section.
How to create cookies in GTM
There is no default functionality available to create cookies in Google Tag Manager, so as usual, in such cases we will use a little bit of JavaScript magic.

Create custom JavaScript variable
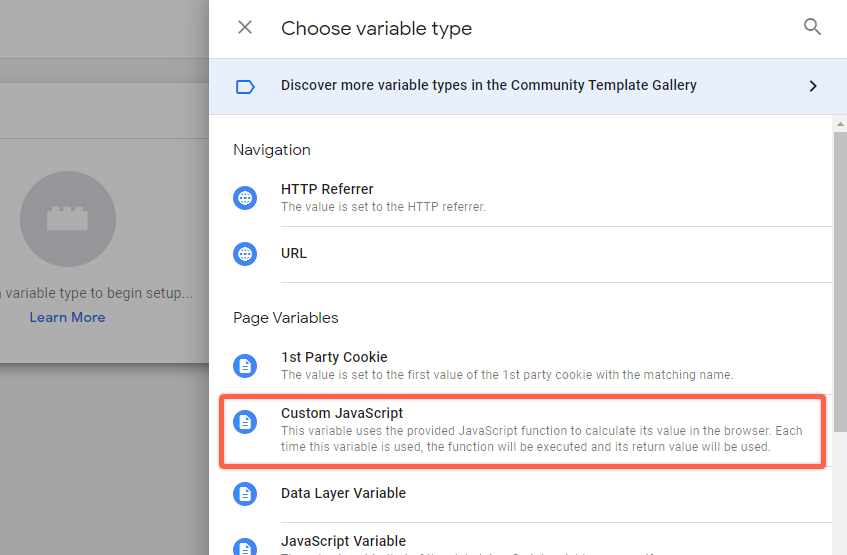
Create a new User-Defined variable and this time pick “Custom JavaScript”.
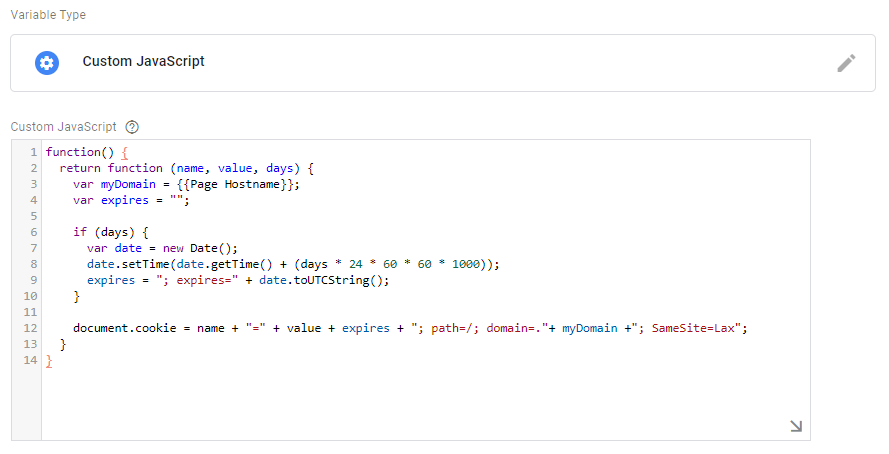
I have already prepared a template that you can use for this purpose, so you can copy the code below, and we will take a look at how it works on a high level.
function() {
  return function (name, value, days) {
    var myDomain = {{Page Hostname}};
    var expires = "";

    if (days) {
      var date = new Date();
      date.setTime(date.getTime() + (days * 24 * 60 * 60 * 1000));
      expires = "; expires=" + date.toUTCString();
    }

    document.cookie = name + "=" + value + expires + "; path=/; domain=."+ myDomain +"; SameSite=Lax";
  }
}
So first of all, this variable returns a function where we can set some parameters dynamically from our tags – name, value, days.
- name – This will be your cookie name (string)
- value – Here you will pass any values that you want to store in the cookie (string)
- days – What is the expiration time of this cookie in days (number). We can also skip this parameter so that cookie would erase once users session on the website has ended.
return function (name, value, days) {
Then, if we have provided expiration time, it will be calculated before setting a cookie:
if (days) {
    var date = new Date();
    date.setTime(date.getTime() + (days * 24 * 60 * 60 * 1000));
    expires = "; expires=" + date.toUTCString();
}
And finally, we create a cookie with given settings and expiration date:
document.cookie = name + "=" + value + expires + "; path=/; domain=."+ myDomain +"; SameSite=Lax";
You can save the variable, and let’s create a new tag to test this.
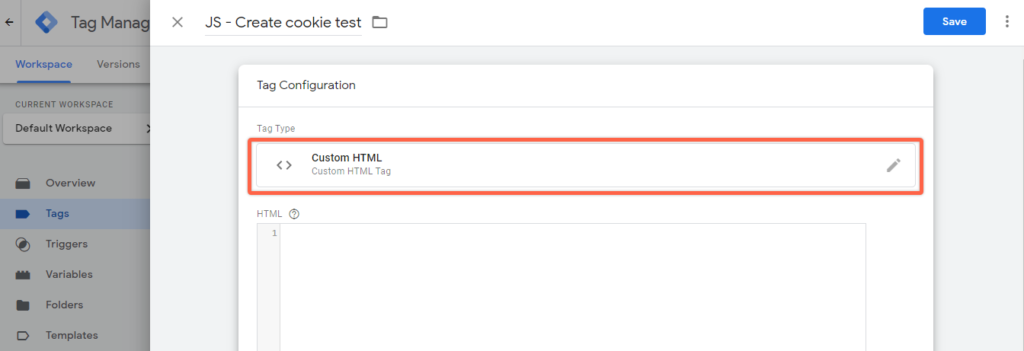
Create a custom HTML tag
Since we are returning a function in our custom JavaScript variable, we need to use HTML tag type to set the cookie.
All the code here needs to be wrapped in <script> tags, so add this to start:
<script>

</script>
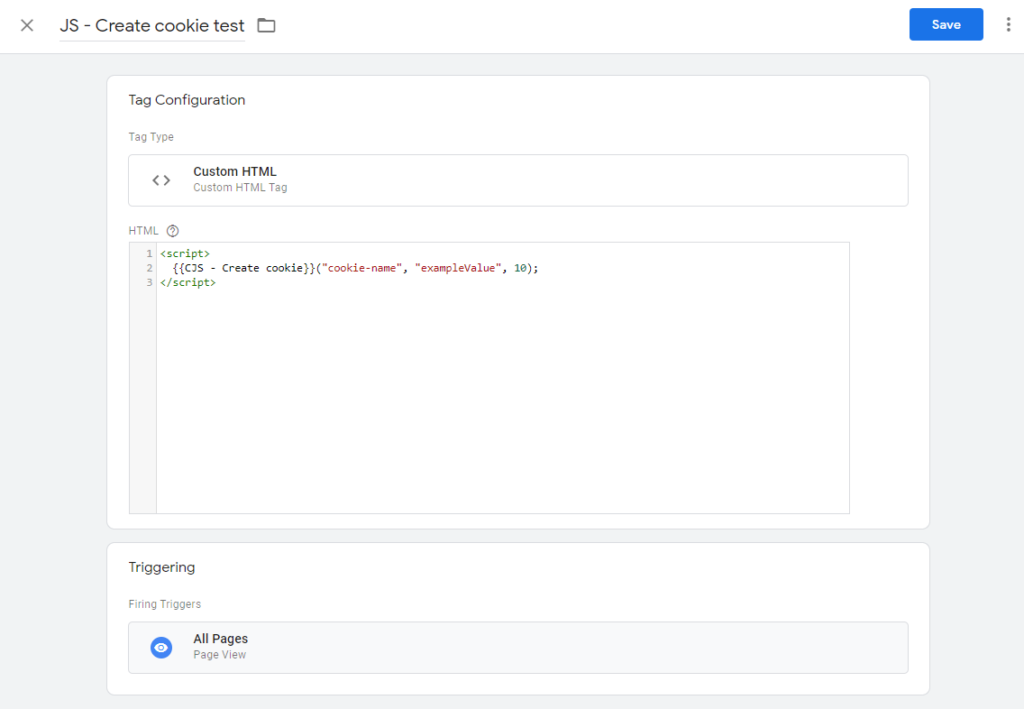
Next, we will reference the variable that we have just created, and since it’s a function we need to add brackets where we provide – name, value, and optional expiration time in days.
<script>
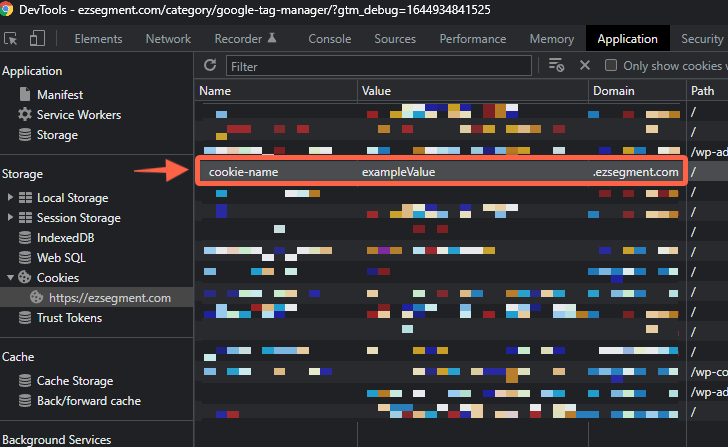
{{CJS - Create cookie}}("cookie-name", "exampleValue", 10);
</script>This example will create a new cookie “cookie-name” with the value “exampleValue” and it will expire after 10 days.
You can use this custom JS variable in your custom JS code and apply additional logic when cookie values should be set or updated. The only thing we have to do is to add a triggering tag.
I will use the “All Pages” trigger, but for the real-world scenario, you would probably use more narrow targeting rules before setting a new cookie.
Test your implementation
To test if you have managed to create a cookie in GTM, open preview mode and trigger an event that fires a custom HTML tag. After that, open the browser console, and if everything has worked correctly you should see your new cookie:
How to delete cookie in GTM
Need to delete a cookie? No problem, just use the same custom JS variable and set a cookie expiration date to -1 in your tag:
<script>
  {{CJS - Create cookie}}("cookie-name", "exampleValue", 10); // Create cookie
  {{CJS - Create cookie}}("cookie-name", "exampleValue", -1); // Delete cookie
</script>
Summary
As you saw it is fairly easy to pick any cookie value from the website using Google Tag Manager, but creating a cookie could be a bit challenging if you are new to JavaScript. You can use example codes provided in this post as templates and use them for your own use cases. With having Custom JS variable in place and example code of how to set a new cookie it should be easily re-usable in any kind of scenario.
Hope this information was useful and as always, let me know if any questions!

Great article and very easy to understand. Thanks for this