
How to set up GA4 in GTM
In this post, we will take a look at how to create and set up Google Analytics 4 using Google Tag Manager on the website. If you already have created the GA4 property and data stream you can skip to the section where we add and test this tag in GTM.
Create Google Analytics 4 property and data stream
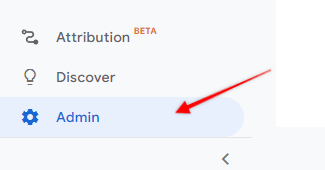
Creating the GA4 property is fairly straightforward. Open your Google Analytics account and head to the “Admin” section (bottom left side of the screen).
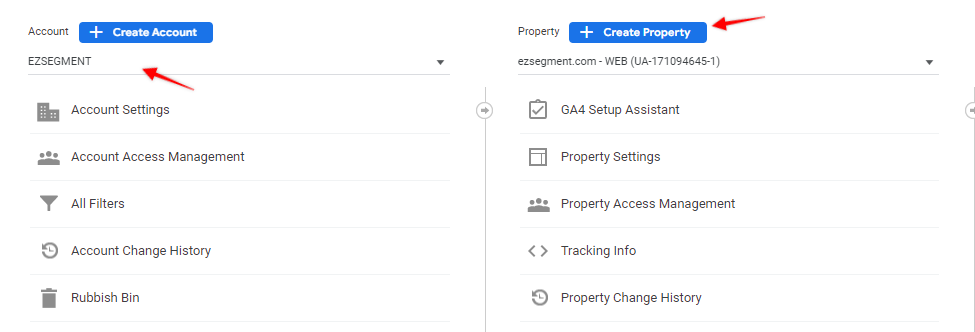
Pick an account under which your GA4 property will be available and click on “Create property”.
In the first step provide the property name, e.g. “yourwebsite.com – GA4”.
Select reporting time zone – I would recommend selecting the one where most of the traffic is expected to make it easier for date/time-related analysis or just the country/region where your business is operating.
Pick the main currency that will appear in your reports.
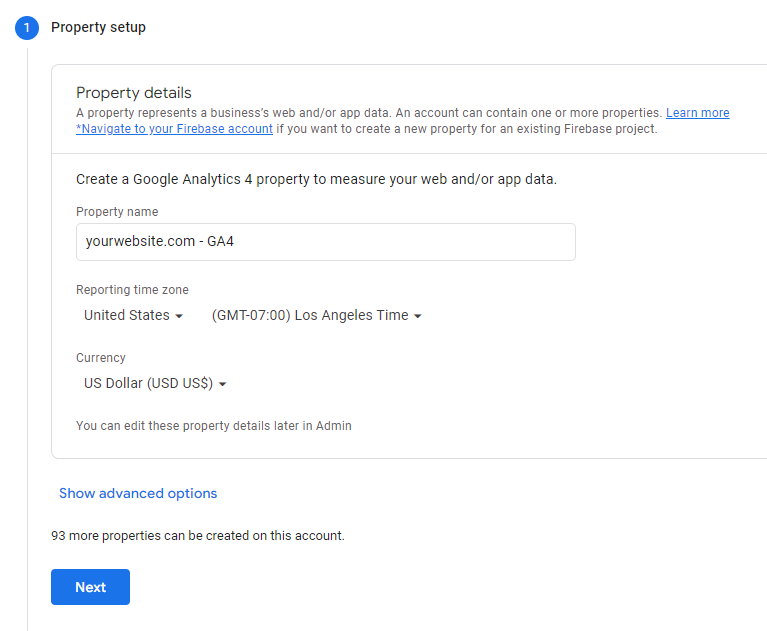
We don’t need to create a separate Universal Analytics account, so you can skip the advanced options and click “Next”.
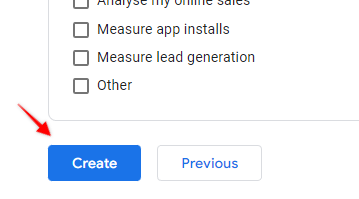
Google will ask for some information about your business, you can skip it, it doesn’t affect your setup and is not mandatory. Click “Create” to proceed.
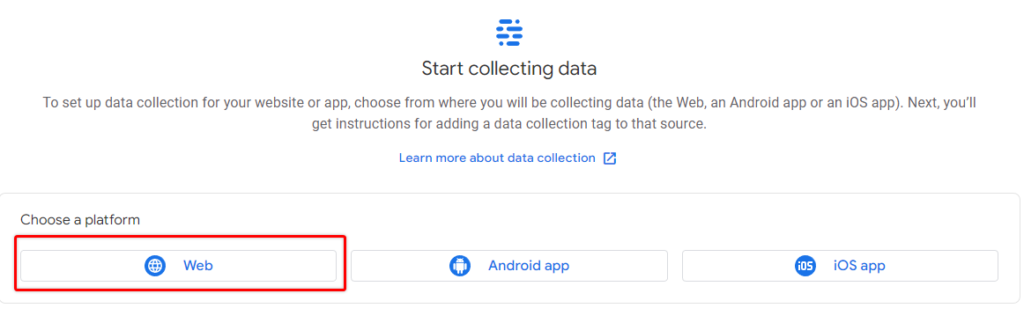
Select a platform where you will add GA4. Since we are using GTM on the website, I will pick “Web”.
Provide a website URL and name for the data stream.

Leave Enhanced Measurement ON since that will collect some of the interaction data like outbound clicks and file downloads automatically. You also have an option to provide some additional settings to set up site search tracking automatically right from the start (you can check the linked article on how to do that). It is also possible to come back at any time and edit these settings, so I will click on “Create stream” to get my tracking ID.
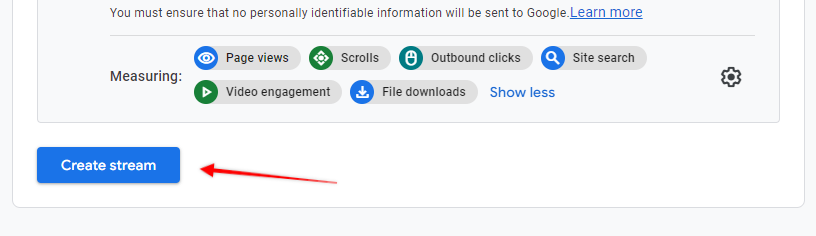
You have now successfully created a data stream that we can use to collect data from your website.
Copy Measurement ID value (in my case – G-0R3XN497QG) and let’s head on to GTM to add the tracking tag.

Create a GA4 tag in GTM
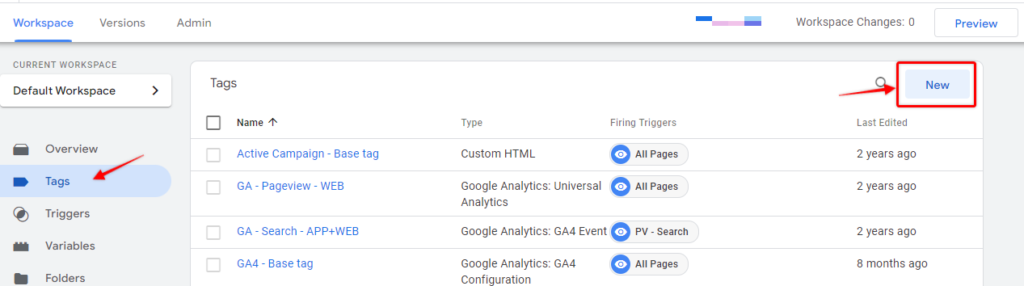
Once you have a data stream and Measurement ID, open Google Tag Manager.
Go to the Tags section and Create a New tag.
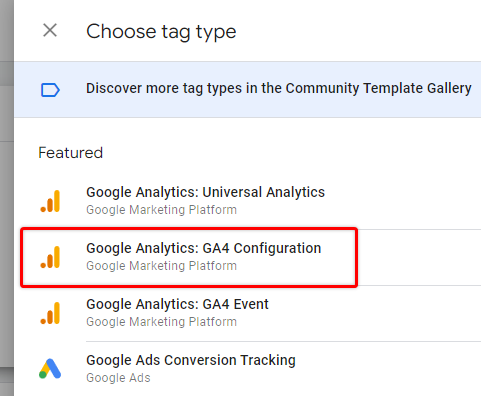
Click on Tag configuration and select “Google Analytics: GA4 Configuration”.
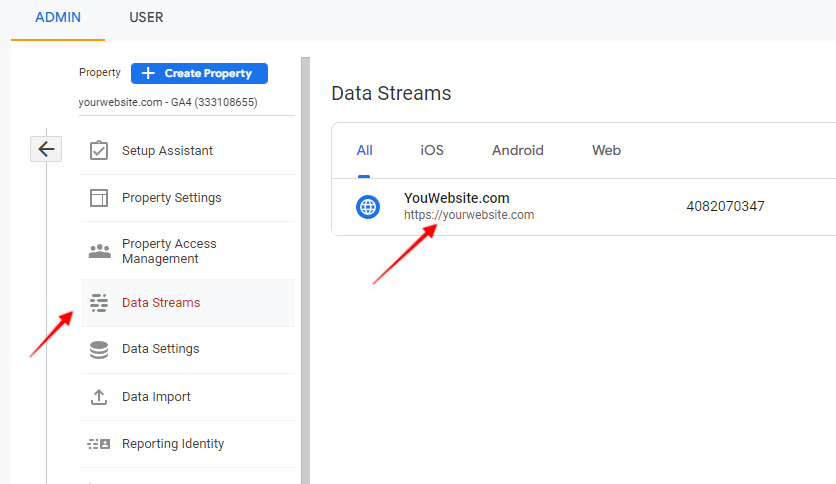
Now paste the Measurement ID that we have just created. If you already had a data stream created before you can find it under the Admin section > Select GA4 Property > Click on “Data Streams” and select data stream.
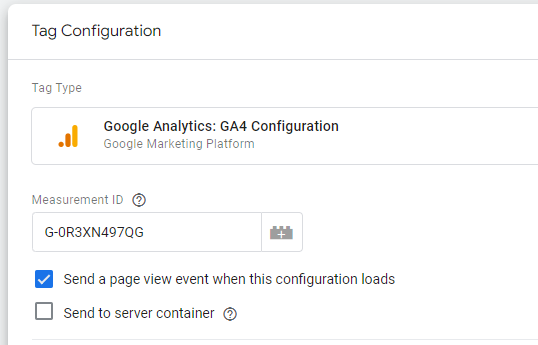
It’s important that you leave “Send a page view event when this configuration loads” enabled for this setup, otherwise, our tracking won’t work correctly.

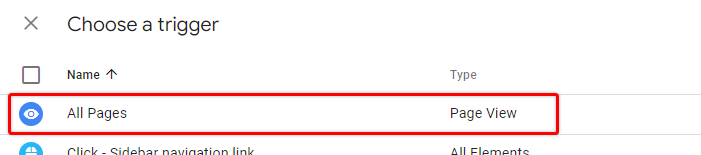
From the “Triggering” block select “All Pages” so that our base tag is firing on all pages.
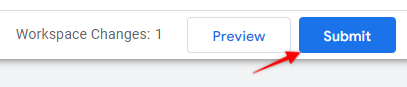
Now, give your tag a descriptive name and save it.

Now, let’s test if this works.
Test GA4 setup
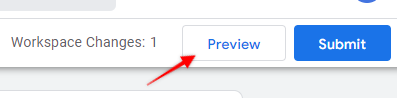
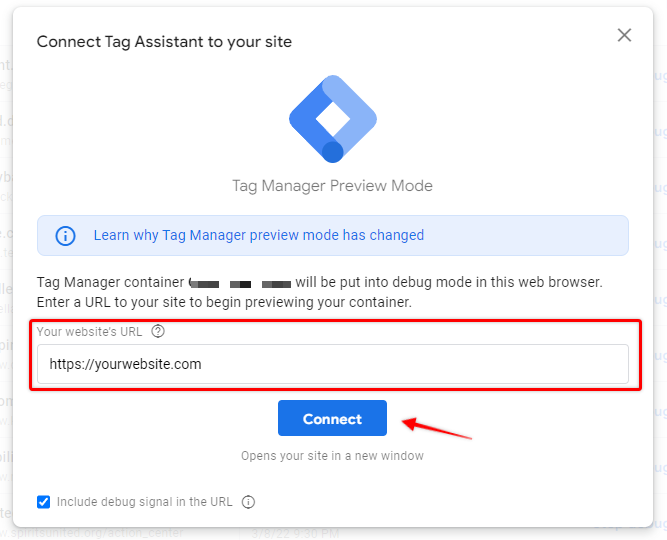
In Google Tag Manager click on the Preview button to initiate preview mode.
A new window or tab will appear asking you which page you want to debug.
Enter your website URL and click “Connect”.
Once the website loads, open the Tag assistant window/tab once again.
Make sure your GTM container is selected on the top, and in the Summary “Tags Fired” section you should see your newly created GA4 tag.
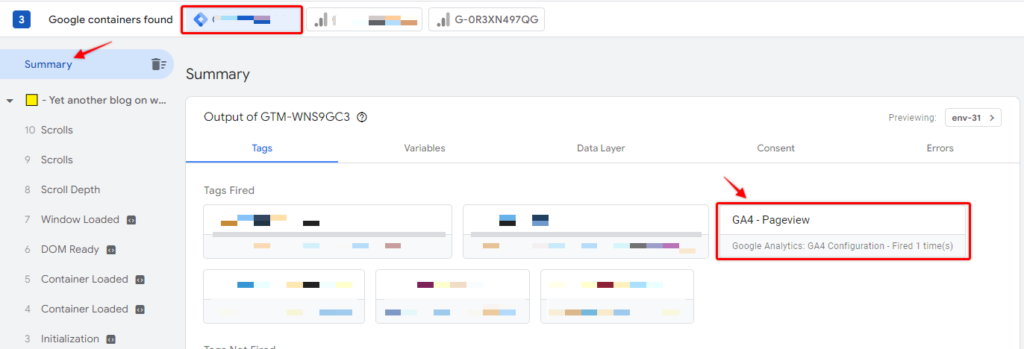
You can navigate your website pages to see if the tag is fired on each pageview and additionally you should see yourself in GA4 DebugView as well.
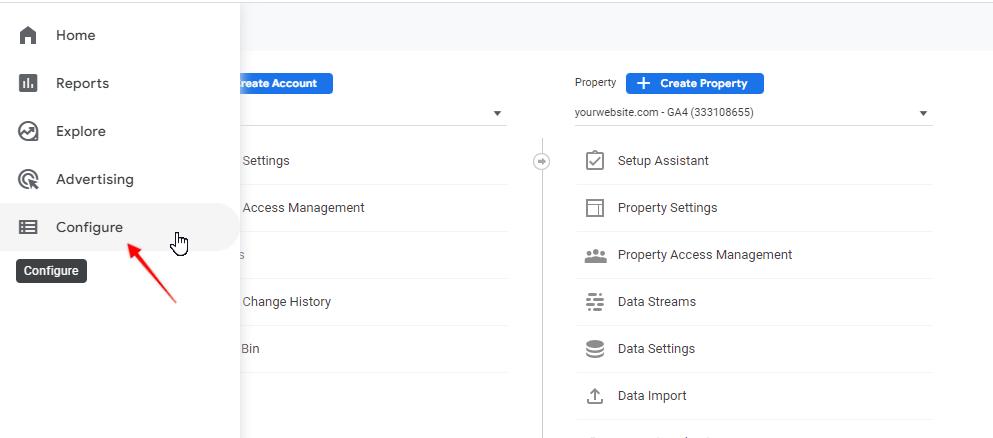
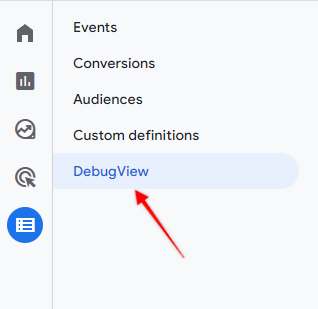
Go back to the GA4 property and now select “Configure” from the left menu. From there select DebugView to open debug console in GA4.
If everything went well and GA4 is receiving the data, you should see your event timeline along with the details for each event. This is also a good way to check any kind of new GA4 events that are added to the website using Google Tag Manager.

All you have to do now is to publish your GA4 tag from GTM.
Next steps – want to explore more?
GA4 is a bit different from Univeral Analytics and you will notice that not only in visual appearance but also in report availability and configuration options.
Here is a short list of articles that could help you with further GA4 configuration and exploration:
- How to track conversions in GA4
- Content grouping in GA4
- How to view landing page report in GA4
- GA4 Funnel report hands-on tutorial
- Cross-domain tracking in GA4
- How to link Search console with GA4
- How to link BigQuery with GA4
- Custom dimensions guide in GA4
- Referral exclusion in GA4
- Set up automated alerts in GA4
