GA4 custom dimension guide
Custom dimensions in Google Analytics allow you to collect additional information about user interactions on the website in a structured and meaningful way. Using custom dimensions in GA4 you can extend the default reporting setup to analyze information that is relevant to your business and for your particular scenario.
In this post, we will take a look at how to find, create, collect and report custom dimensions from Google Analytics 4.
Where to find GA4 custom dimensions?
If you have worked with Universal Analytics before you might have used custom dimensions there. Previously you could find those under Property settings in the Custom Definitions section.
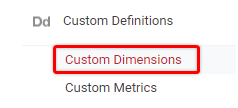
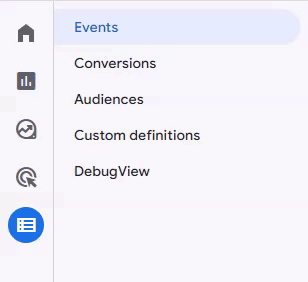
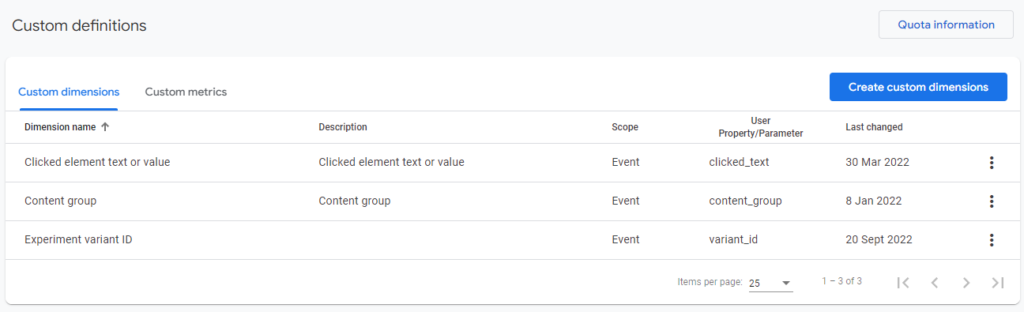
In GA4 you don’t need to go into the Admin area instead there is a separate “Configure” section where you can find “Custom definitions” which lists all your custom dimensions and metrics.
Here you can add new custom dimensions to your setup or edit/archive existing ones.
How to create a new custom dimension in GA4?
- In the Custom definitions section click on “Create custom dimension”

- Provide additional information about a new dimension
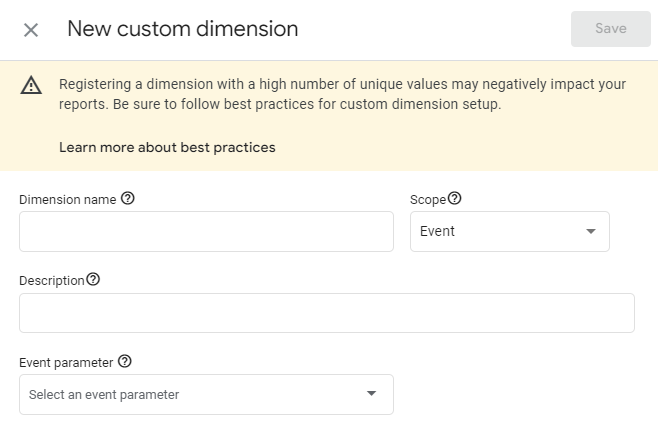
- Dimension name – This is how your dimensions will be visible in reporting UI so it’s best if the name describes what data is stored inside of this custom dimension.
- Description – This is an optional field to further describe your custom dimension
- Scope – Can be either “Event” or “User” and determines if your dimension value is applied only to a specific event or to all user interactions. Normally you would want to use “User” only on the data that is persistent for the same visitor across any events, e.g. – gender, account type, loyalty reward level, etc. NB! This can’t be edited after creation.
- Event parameter – This is a unique dimension name that will be used to pass data into GA4.
You can use only letters, numbers, and underscores for the event parameter name.
The maximum length of the event parameter is 40 characters, and 24 characters for user properties (dimensions with User scope). NB! You can’t edit this value either after it’s created.
Once you hit “Save” a new custom dimension will be created and appear in the list. Now all you have to do is to pass it together with GA4 events (described in further sections).
Main differences between Universal Analytics and GA4 custom dimensions
- Reduced available scopes – GA4 custom dimensions can be only Event or User scoped (at the moment), while Univeral Analytics could additionally have Session and Product level dimensions.
- Increased Quota limits – GA4 allows far more custom dimensions and metrics than Universal Analytics. In the previous GA version (non-360) you could have up to 20 custom dimensions + 20 custom metrics.
In GA4 you can have 50 event-scoped, 25 user-scoped dimensions + 50 event-scoped custom metrics.
How to send custom dimensions to GA4 from GTM?
Sending dimension values from GTM to GA4 is done similarly as in Universal Analytics, and this time it’s even more intuitive since we are using dimension parameter names instead of indexes.
Let’s take a look at how we can pass custom dimensions based on a simple click event example.
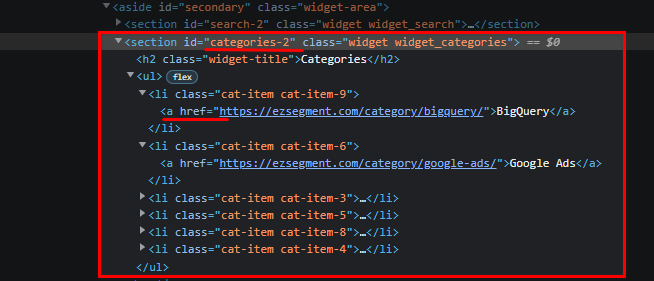
I have a link list on a sidebar and I want to see how many people interact with each item.
I will use click event data to pass clicked link text to a custom dimension in GA4.
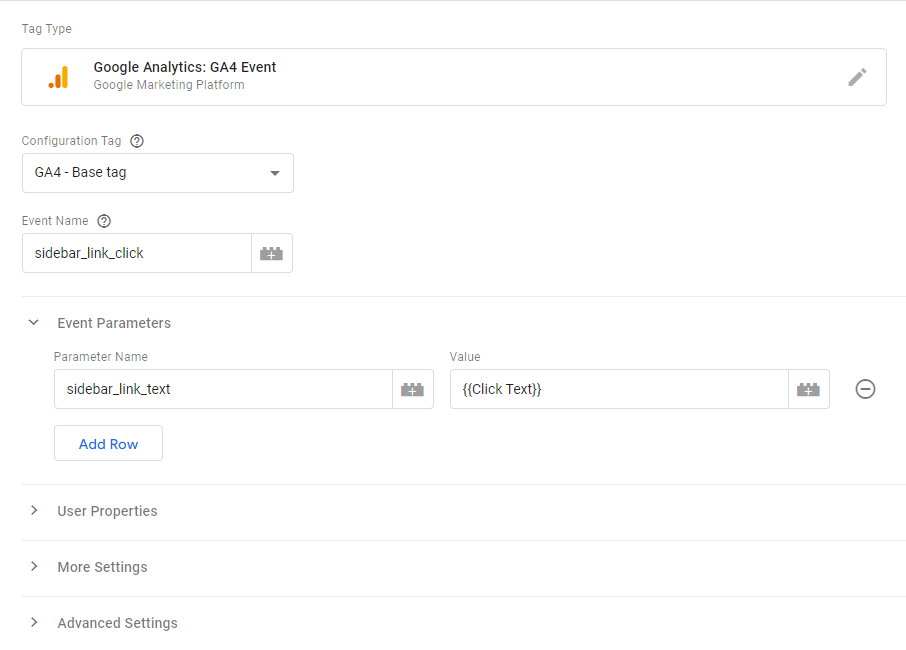
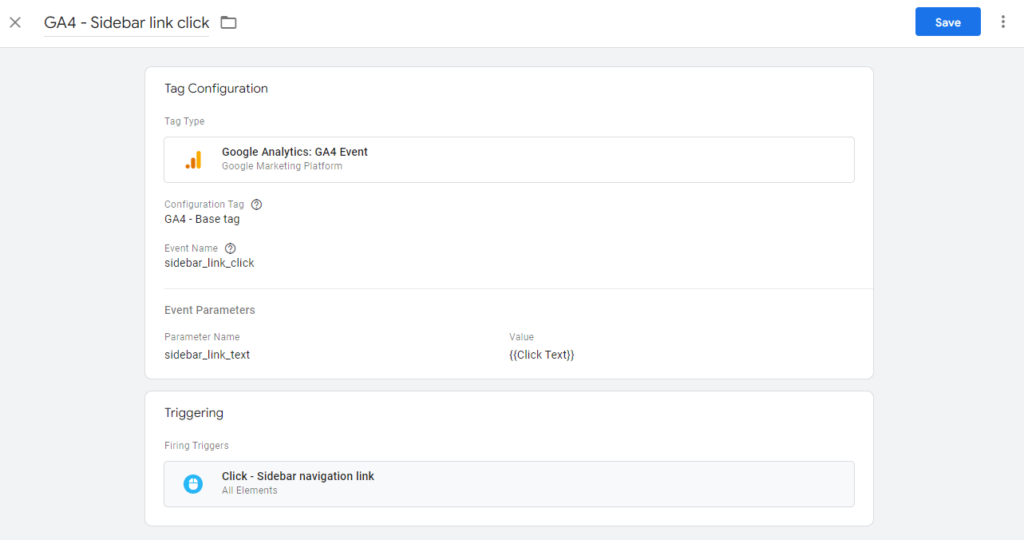
- In GTM go to the Tags section and create a new GA4 Event tag.
- From the “Configuration Tag” dropdown select your main GA4 pageview tag.

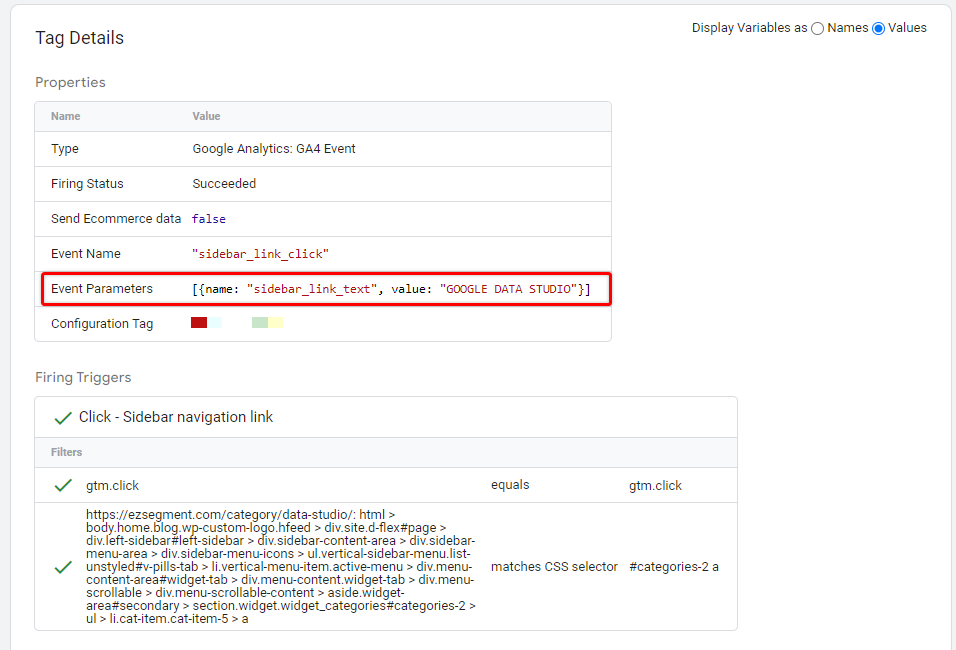
- The event name in my case will be “sidebar_link_click”
- Under Event Parameters, we can add a custom dimension that will collect clicked link text.
Before we do that, we need to create it in GA4 UI, otherwise, even if we send such data no information will be collected. - Open GA4 property. Go to Configure > Custom Definitions and Create a custom dimension.
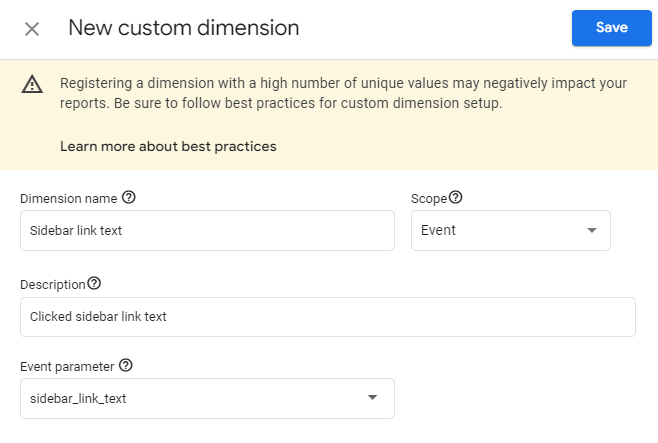
- Add dimension settings. In my case I will call it “Sidebar link text”, it will be “Event” scoped since each click can have a different link text and the Event parameter name will be “sidebar_link_text”.
- Save custom dimension and go back to GTM tag setup
- Add a new row in the Event parameter section and provide the newly created dimension name – “sidebar_link_text”.

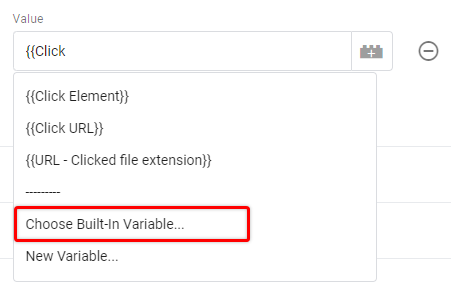
- For parameter value, we will use the “Clicked text” built-in variable, since we will be tracking simple link clicks.
- If you don’t have Clicked text variable available in the dropdown, just click on “Choose Built-In variable”
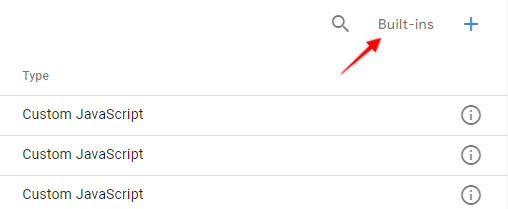
- Click “Built-ins” on the top right corner.
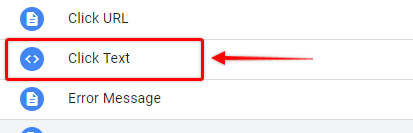
- And select “Click Text”
This is how your tag settings should look like at this moment:
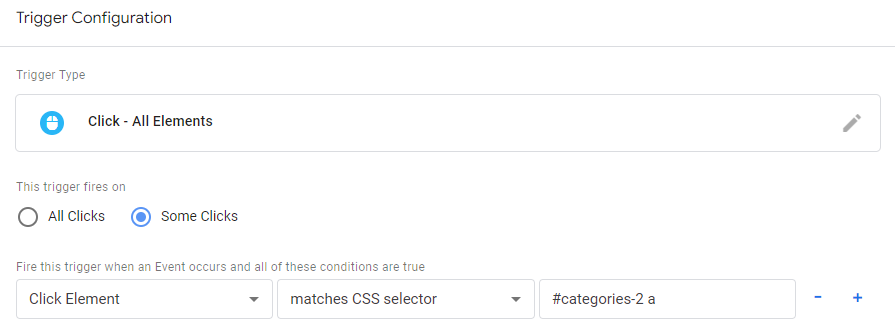
- Next, create a trigger for your event. In my case, it will be just a simple click event on a specific CSS selector. You can check this article on how to set up click triggers in GTM if you haven’t done this before.
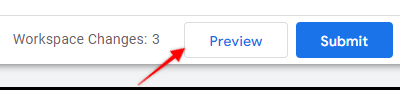
Once you are ready – save the tag, and let’s test it out in preview mode!
- Click on the element that you have tracked, and in the Tag Assistant find this click Event.
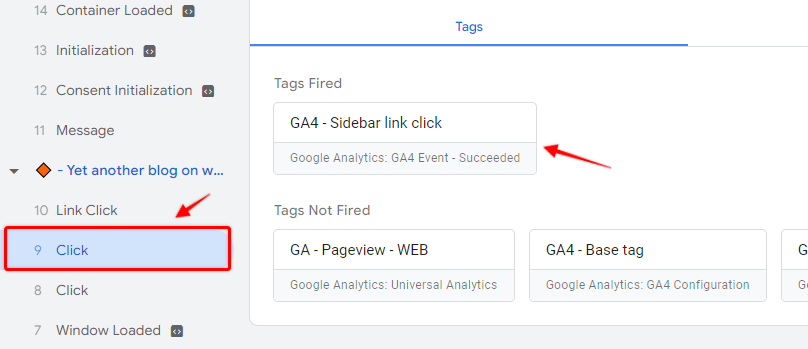
- Click on the GA4 tag that was triggered and you should see your custom dimension being sent.
- Check if you see the expected dimension value here, and then we can double-check it from GA4 Real-time reports.
- Open your GA4 property and go to Configure > DebugView
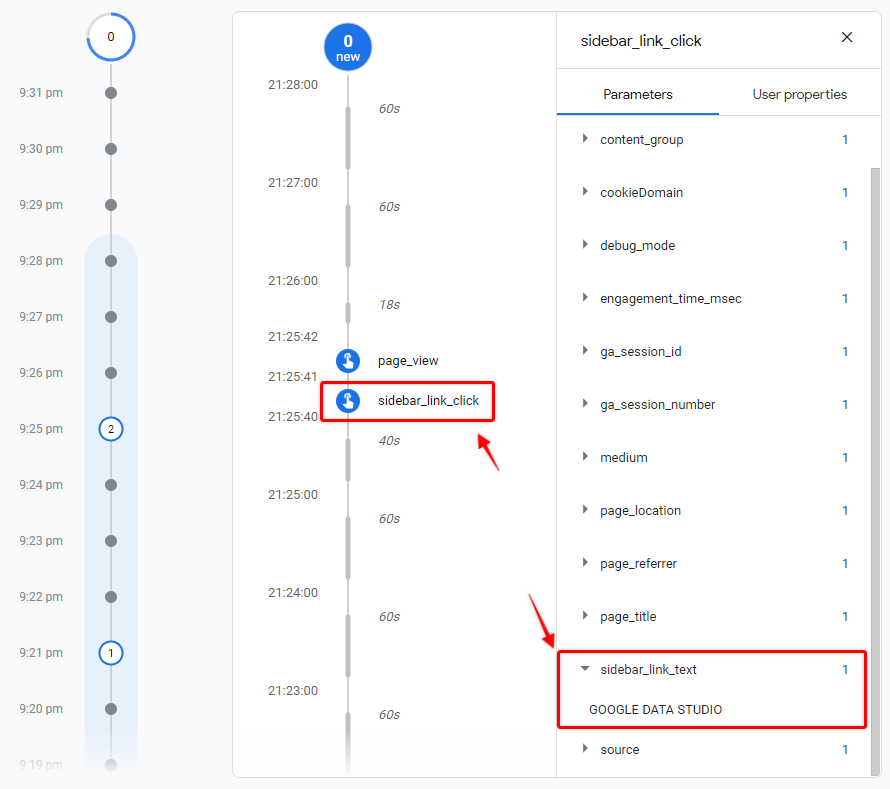
- You should see your event in the event feed, and once you click on it – you should be able to find a custom dimension that we just sent to GA4. Double-check if it matches the expected value.
And that’s it, now all you have to do is to publish your tag. Of course, the variable will be different depending on what data you are trying to get, but the overall approach for passing custom dimensions to GA4 using GTM will remain the same.
Migrating custom dimensions from Universal Analytics to GA4
You will need to re-create any existing custom dimensions from Universal Analytics in GA4 and pass them with the appropriate Page view or event tags. Also, since GA4 doesn’t have Event action or Event label fields you will need additional custom dimensions to be used for those scenarios. It’s up to you if you want to use generic “event_action” and “event_label” dimensions or if you want to have more specific dimensions e.g. “button_text”, “menu_item_name”, etc.
There is a detailed article by Google on how to map custom dimensions effectively from their point of view.
Here is a short suggestion list of the main things that you would need to do to collect the same data in GA4 custom dimensions:
- Since GA4 has only 2 dimension scopes at the moment then you would need to select “Event” scope for the current “Session” and “Product” scoped dimensions from Universal Analytics.
- Map all of your Universal Analytics events – This will help you to understand if you can group some of those Actions/Labels under the same custom dimension (e.g. navigation item names) or decide to go the easy way by creating “event_action” and “event_label” custom dimensions that replicate the same fields in Universal Analytics.
- List all your new event names together with dimension names in the same file mentioned above – It will help you to find collected data after tracking was created and to keep track of the migration progress.
Overall, when moving to GA4 you might want to completely re-think the structure of events/dimensions you are currently collecting considering the new event-based model to make it easier to navigate afterward.
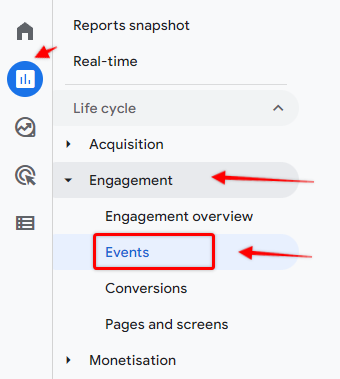
Where to find custom dimensions in GA4 reports
Events report
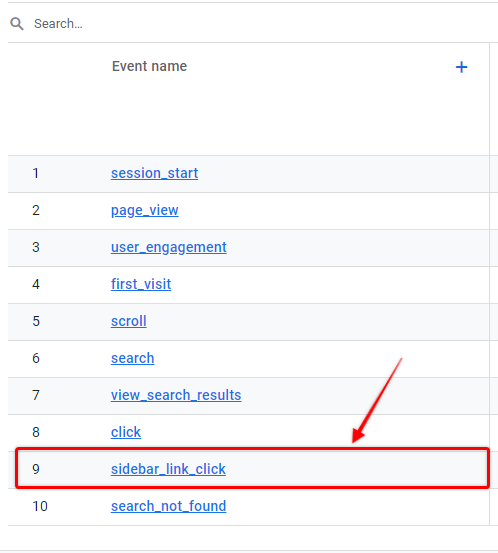
The easiest way how you can find your custom dimension values is by going to Reports > Engagement > Events
And click on the event name from the event list that contains your custom dimension.
GA4 will show multiple cards relevant to this event, and you should search for the one with the dimension name. Here you will see a list of TOP values which are being collected in the reports.
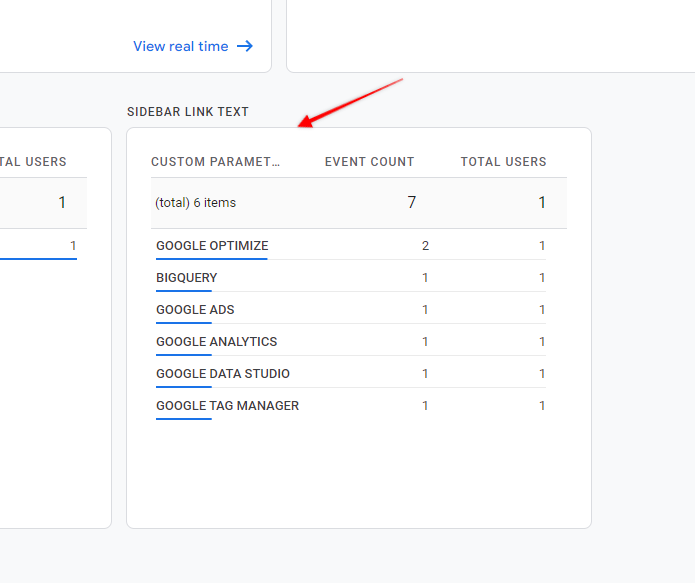
If you have multiple custom dimensions attached to the same event they will appear on this page as separate blocks. By changing the date range you can filter out displayed values as well.
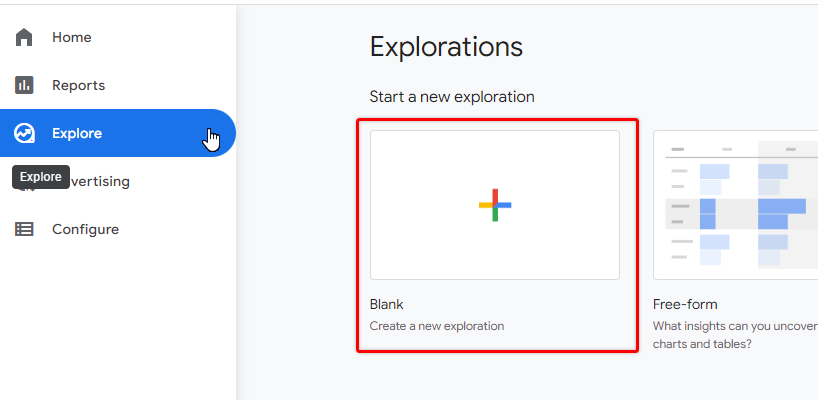
Custom Exploration report
If you want to have a dedicated report for your custom dimension or you want to output some user properties then custom reports would be the way to go.
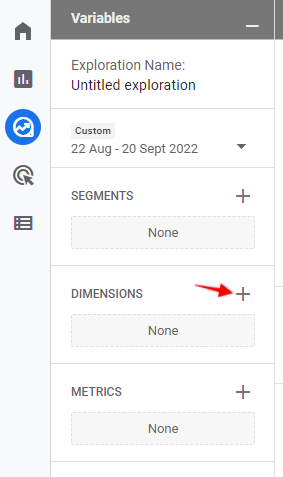
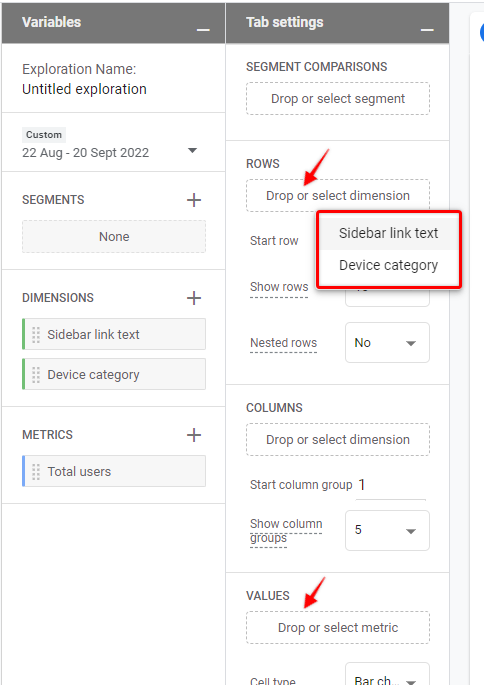
To create a new custom report go to Explore section and create a new “exploration”.
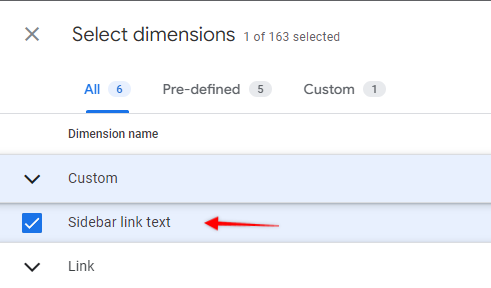
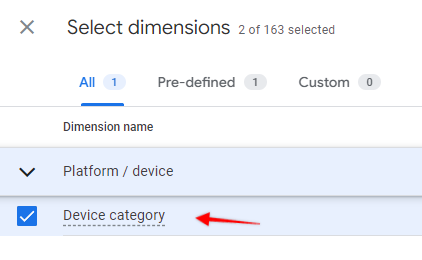
From dimensions select your custom dimension and some additional ones if you want to further segment your data. For example, you could add a Device category to split dimension values per device type.
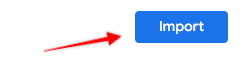
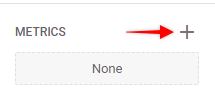
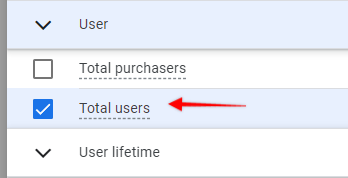
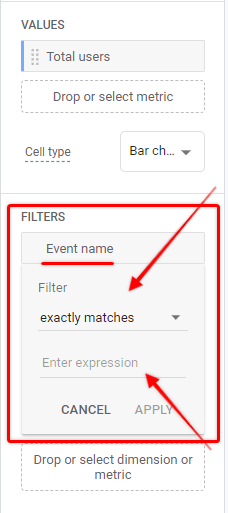
After dimensions were imported, let’s import the Total User count as our metric.
Add imported dimensions as our rows and total uses as a value in Tab settings.
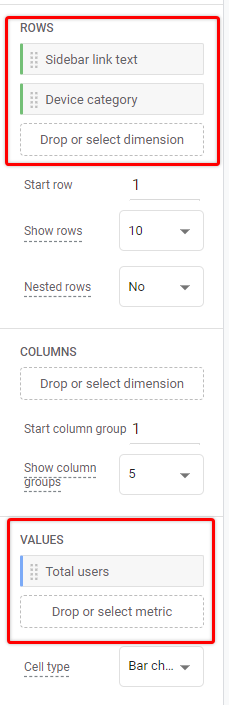
Also, to filter out a specific event we need to filter this report by event name, otherwise, it will contain a lot of (not set) values since those are not passed to all of the users.
For this, we will import an additional dimension – Event name.
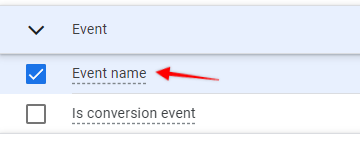
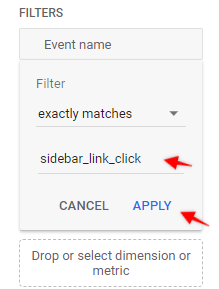
And then in Tab settings click on Filters > Event name. The following card will appear, asking to add filter condition. I will add my event name “sidebar_link_click” to filter data only for this event.
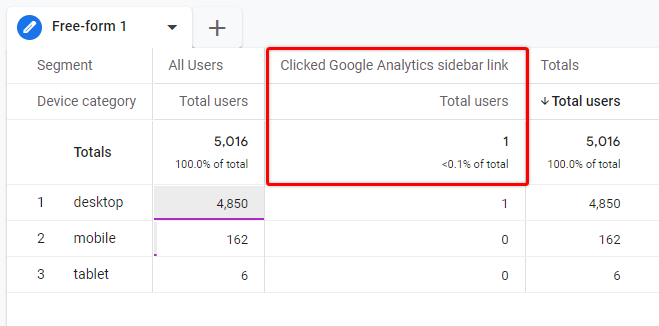
Finally, on the right side, a table with dimension values split per device category will appear.
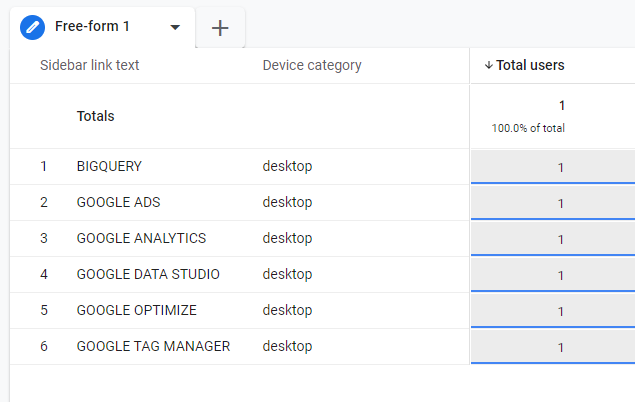
You can then further refine this report by adding additional dimensions or metrics that you are interested in.
Using custom dimensions in GA4 segments
It is also possible to use custom dimensions in GA4 segmentation. To create a segment based on collected values open a segment configuration window in the exploration report.
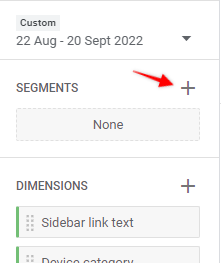
You can pick any segment type, I will use the User segment for my example.

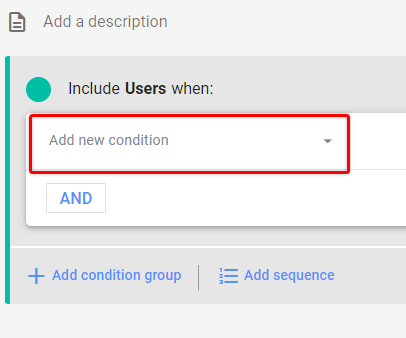
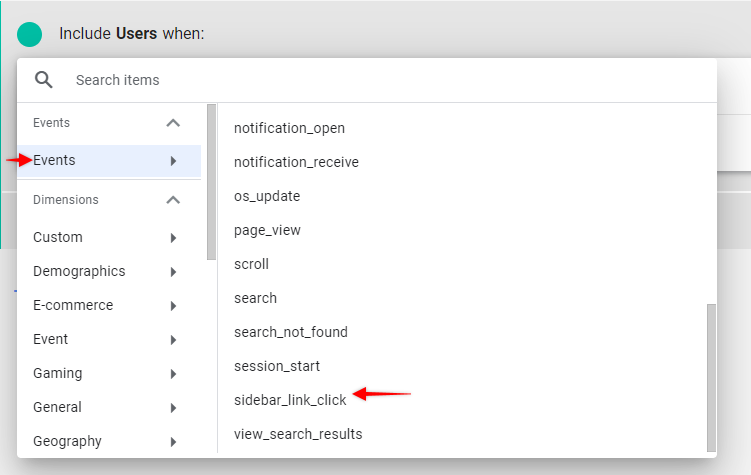
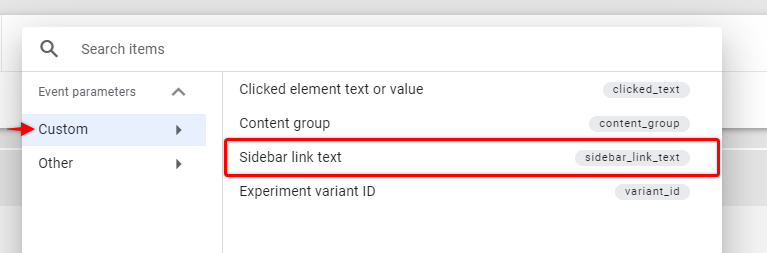
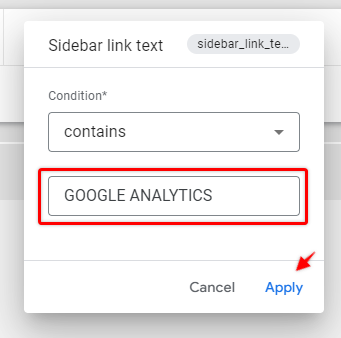
I will segment users who had a “sidebar_link_click” event and clicked on “GOOGLE ANALYTICS” link text.
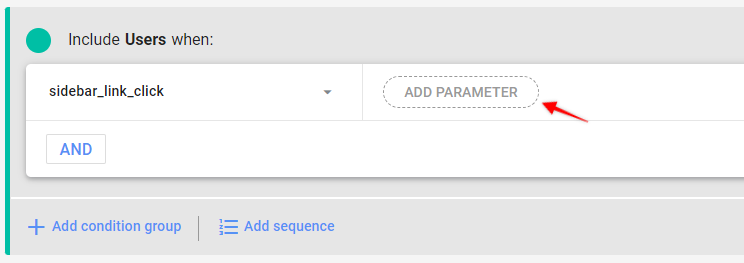
Select event name a condition and then Add a custom dimension as a parameter.
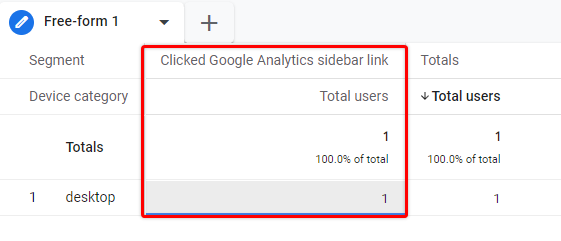
Once you save your segment it will be added to the list and applied to your report and you will see users who are included in your segment alongside totals (or other segments).
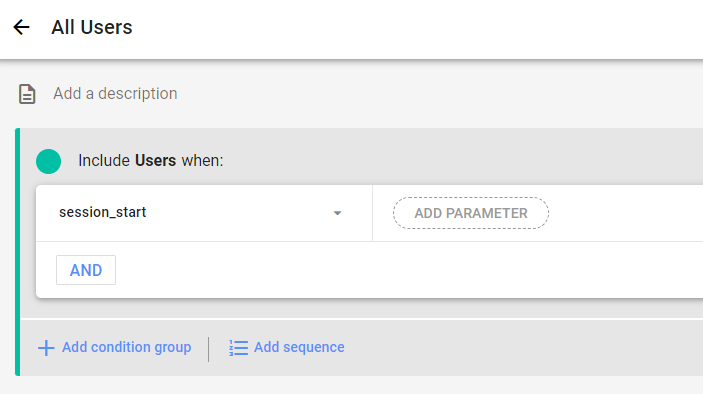
To compare this segment will all users you will need to create a separate segment. The easiest way how to segment All Users in exploration reports is to create a condition for the “session_start” event.
Now you should be able to see how your custom dimension-based segment compares to all visitors or any other groups.
This is a very basic example but should give you an understanding of how to apply this in your own segment setup.
Summary
Custom dimensions in GA4 are an essential part of any kind of data collection in the new GA version and I hope you found this guide useful and practical. In this post, we have reviewed the full process from creating to reporting and segment creation, which should help you to get started with your own implementations.
