How to install Google Analytics using Google Tag Manager
In this step-by-step guide, we will install Google Analytics pageview tag on your website using Google Tag Manager so that you can start collecting data from your website. The main focus will be on the configuration in GTM, so to follow along you should already have:
- Google Analytics account
- Google Tag Manager installed on your website
Let’s start by opening your Google Tag Manager Account and clicking on the “Variables” section on the right menu.
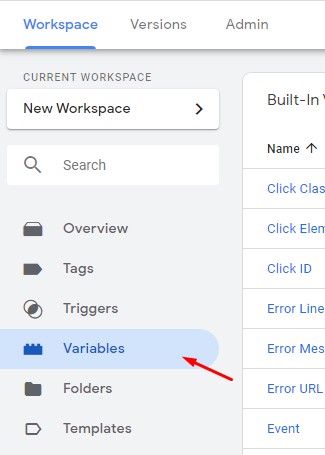
Now find section named “User-Defined Variables” and click on “New” to create new variable.

Here we will add Google Analytics settings variable that will store your property ID and can be re-used in any Google Analytics tags that you might want to create in the future.
You can name your variable “GA settings” and by clicking on “Variable configuration” select – Google Analytics settings:
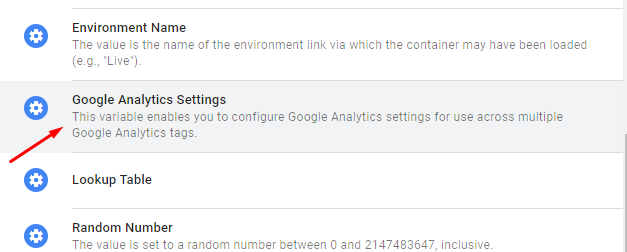
For basic Pageview setup we will need to specify only the tracking ID, which you can get from your Google Analytics account:
- Open your Google Analytics by going to https://analytics.google.com
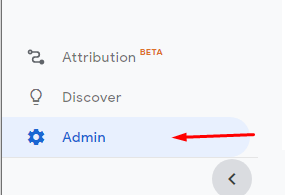
- Find “Admin” section in the right menu at the very bottom of the page
- Find “Property” column and make sure that you have selected correct Google Analytics property that needs to be installed. Then click on “Property Settings”

- Copy Tracking ID you see on the settings page
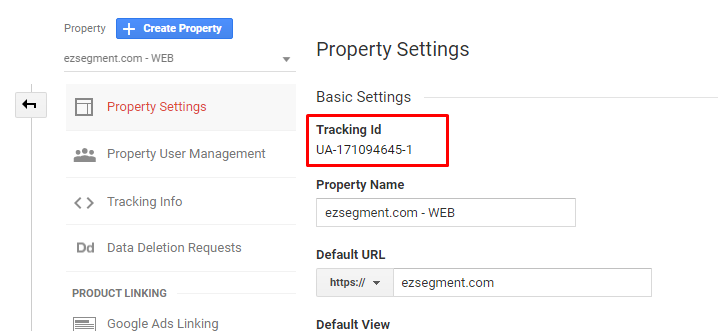
Make sure you copy only the value in format UA-XXXXX-X
So in my case, it would be UA-171094645-1
- Paste the value in Field named “Tracking ID”. Make sure it has no spaces before or after the ID, otherwise you Google Analytics tracking will not work.
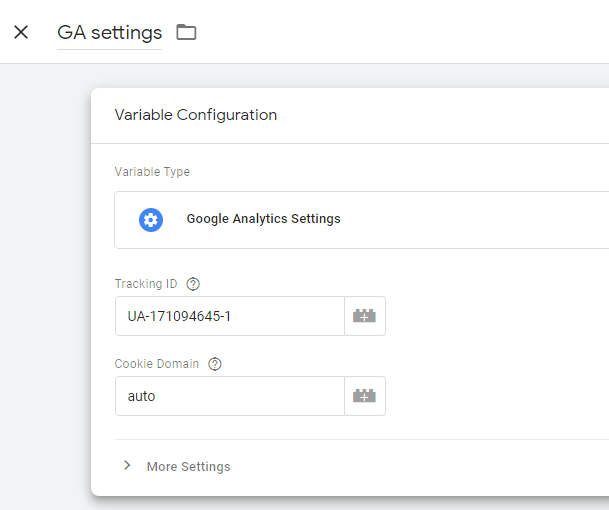
As we are creating only a basic Google Analytics setup, we don’t need to change any other settings here. If you would want to configure Enhanced eCommerce setup or add custom dimensions, it would be a little more complex than that 🙂
- For now, let’s save this variable and go to “Tags” section to create Google Analytics pageview tag.

- Click on “New” and create a new tag.
You can name it “GA – Pageview” - Click on “Tag Configuration” and select “Google Analytics: Universal Analytics”

- “Track type” should remain “Page view” as we are going to setup a tag that fires on each page change.
- From Google Analytics Settings dropdown select variable we just created – {{GA – settings}}
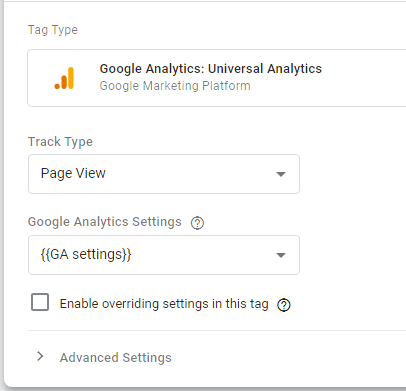
We don’t need to change anything else for our basic setup, so the last thing we need to do is to add a condition when our Google Analytics tag should fire. As we want to track Page views, our tag should fire each time a visitos changes a page and we can use a built-in Trigger for that, named – “All Pages”.
- Click on Triggering and select a trigger named – “All Pages”

- Now, you can save you tag and we should be good to go!
One last thing that we have to do, is to publish our changes so that our newly created setup is available on the website.
- On the top right menu, click on Submit
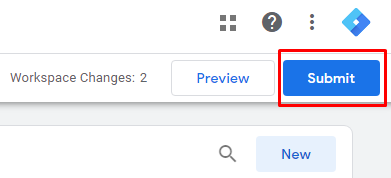
- And then again, click on “Publish” to publish your changes LIVE

🎉Congratulations, now you have successfully installed Google Analytics tag on your website using Google Tag Manager!
Verify your Google Analytics installation
You can easily make sure that your new tag is working properly and receiving data. To do that open your website and refresh the page, so that new changes are loaded into the browser.
Then open your Google Analytics account “Home” section. If you have done everything correctly, then now you should see some active user count on the right side of the screen:
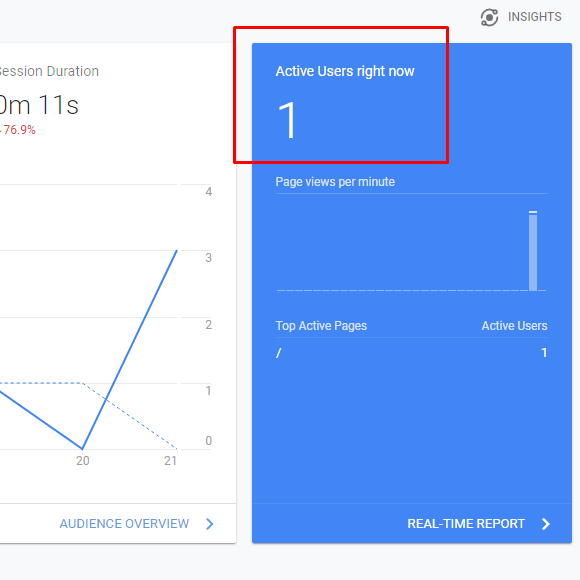
If you don’t see any Real-time data in your report, please check:
- If you have specified correct Tracking ID in Google Tag Manager settings.
- If you have used correct tag type and event type in Google Analytics tag
- If Google Tag Manager is actually installed on your website
Hope you found it useful!

