
Introduction to GTM data layer for beginners
In this post, I will explain the concept of the data layer, how it works with Google Tag Manager, and show a couple of examples of how it may be practically used on your website.
What is a Data Layer?
A data layer is a JavaScript object that groups and stores data on your website in a structured way. Usually, the data layer contains information that is used by 3rd party tools (analytics, ads snippets, personalization tools, etc) to enrich existing reports with additional data or segment customers based on data layer contents.
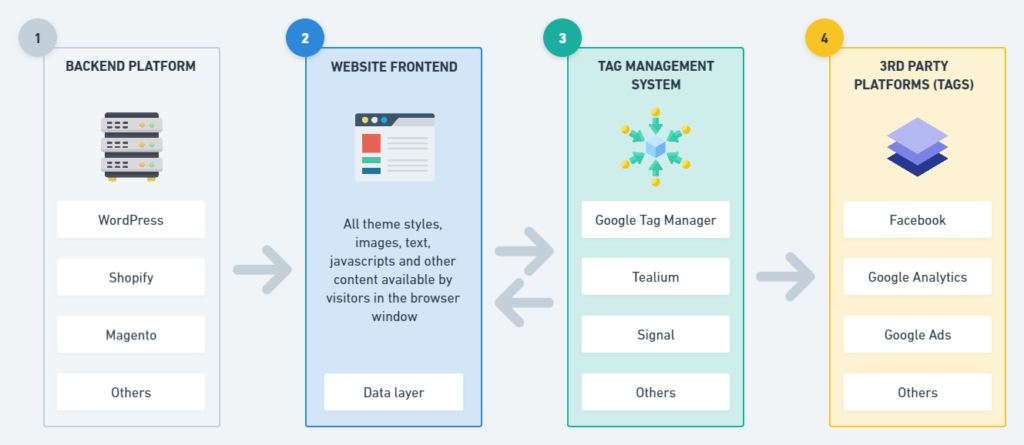
The data layer is available on the website frontend (2) and often contains information from the backend system (1) which can’t be extracted from the website using only the Tag Management system (3).
An available data layer is used by Tag Management systems (such as GTM) to pass dynamic information to 3rd party tools (4) to provide better value. For example, you could pass viewed product ID to Google Ads to enable dynamic remarketing or User ID to Google Analytics to have more precise reporting.
In a perfect scenario, you would have a single data layer object that contains all necessary data for your 3rd party tools.
Example dataLayer object from a blog post on this site:
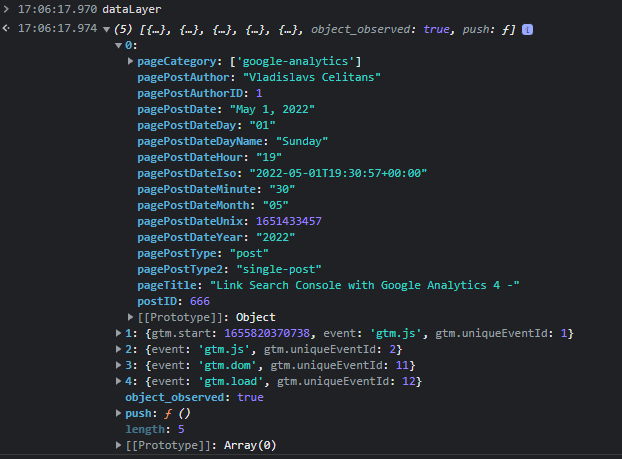
In the example above you can see that this object contains detailed information about the blog post – page category, post author, date when the post was published, and other relevant information.
When the page loads, this information can be used, for example, by Google Analytics to have visibility about post categories in the reports.
Another example – dataLayer from an eCommerce store:
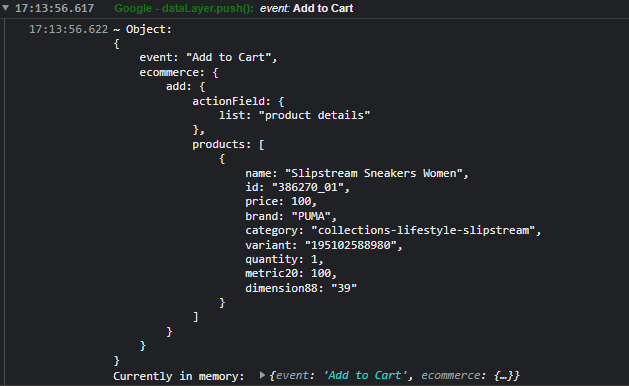
In this example website is adding dynamic product information (price, name, id, etc.) in a data layer once a customer adds a product to a shopping cart. Using GTM we can use this event as a trigger to pass information further to Google Analytics, Facebook, Google Ads, and any other vendors.
The data layer in Google Tag Manager
The data layer in GTM is a JavaScript object on your website that contains both website interaction data and custom information that is passed from a backend. The data layer is at the core of every trigger that you use in GTM. Even if you have a trigger type or variable available in the user interface, most of it comes from the data layer which is created by GTM automatically.
For example, Pageview triggers like – Pageview, DOM ready, and Window loaded triggers are actually coming from dataLayer.
If your website has GTM installed, you can open the website and click F12 to open the developer console (In Google Chrome). And then navigate to the “Console” tab.

In the console input field type – “dataLayer” and hit Enter to preview current dataLayer contents.
Click on the console outputs under the dataLayer to expand it and you will see all dataLayer contents that are available on the current page at this point.
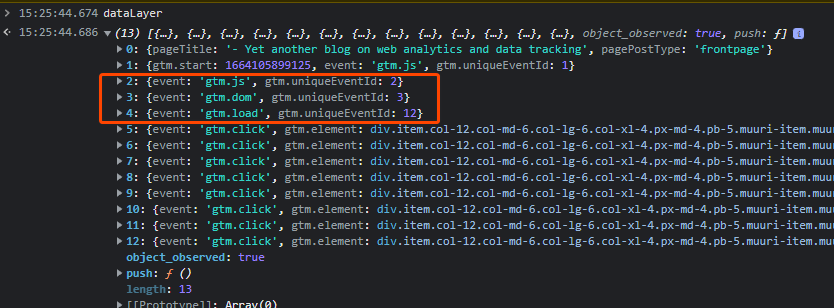
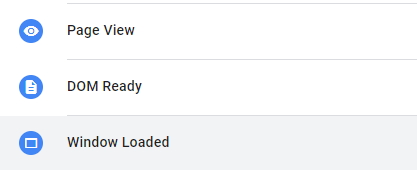
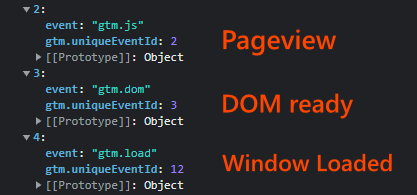
You will see at least these 3 events:
- gtm.js – Pageview event
- gtm.dom – DOM ready event
- gtm.load – Window Loaded event
This is where those default triggers are actually launched from.
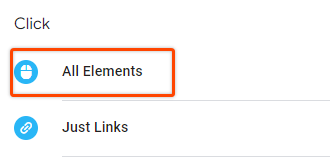
In my screenshot I also have a bunch of “gtm.click” events which are actually used by another defatult trigger “Click > All Elements”.
For almost all of the trigger types, there is a data layer event behind it.
We can enhance dataLayer with additional information that is normally not available on the website frontend. For example, we can pass product SKU or other IDs (which are often not available on the front end), Logged in User ID, Loyalty level, user email, product stock status, Order ID, and any other information which enhances data in your 3rd party platforms. It is also possible to push custom event names on certain user actions and then use it in GTM to trigger tags.
How to add custom data into the GTM data layer?
Most likely you will need to work together with your website developer to add any dataLayer codes to the website source. The two most common dataLayer pushes will contain at least an event name or at least one attribute.
Example #1 of dataLayer based on User interaction (Visitor logged in):
<script>
    // Executed when user is logged in
    window.dataLayer = window.dataLayer || [];

    window.dataLayer.push({
      "event": "userLogIn",
      "userId": "3490231",
      "loyaltyLevel": "platinum"
    });
</script>
In the example above we send a custom “userLogIn” event with additional user ID and loyalty level information when the visitor logs in. Once this is triggered GTM can either execute a tag based on this event name or just fetch a User ID with loyalty level to pass it to 3rd parties.
Example #2 – Using dataLayer to make certain data available on page load:
<script>
    // Should be placed ABOVE GTM code snippet
    // Makes data available for any tags once GTM is loaded
    window.dataLayer = window.dataLayer || [];

    window.dataLayer.push({
      "userId": "3490231",
      "loyaltyLevel": "platinum"
    });
</script>
As you can see now we don’t have a dedicated event name, and the code should be placed BEFORE the GTM container snippet so that any tags can use this data as soon as the page loads.
What is a Data layer “push”?
DataLayer push is just a method name used in JavaScript to add new data to the existing array. So when you are using dataLayer.push() in the code you just add an object with data to an existing array named “dataLayer”.
You can read more about how the Array push method works in JavaScript on MDN.
NB! It is always preferred to extend existing dataLayer rather than re-writing the object by assigning a new set of items. If you are not using the push() method to add values in dataLayer you might encounter issues in GTM trigger and variable setup.
What is a Data layer event?
A data layer event in GTM is any value that we pass in the “event” parameter. We can use this value in the GTM UI setup to trigger other tags.
E.g. in the code snippet below ‘userLogIn’ is the event name.
window.dataLayer.push({
      "event": "userLogIn",
      "userId": "3490231",
      "loyaltyLevel": "platinum"
});
Make sure to use unique event names in your dataLayer or use unique attribute values so that you are able to differentiate them in your GTM tag setup.
What is a Data layer variable in GTM?
Data layer variable is any attribute in the dataLayer object, including the “event” field. The exception to the “event” field is that only this field can be used as a trigger, you can’t use any other dataLayer attributes to trigger an action in Google Tag manager.
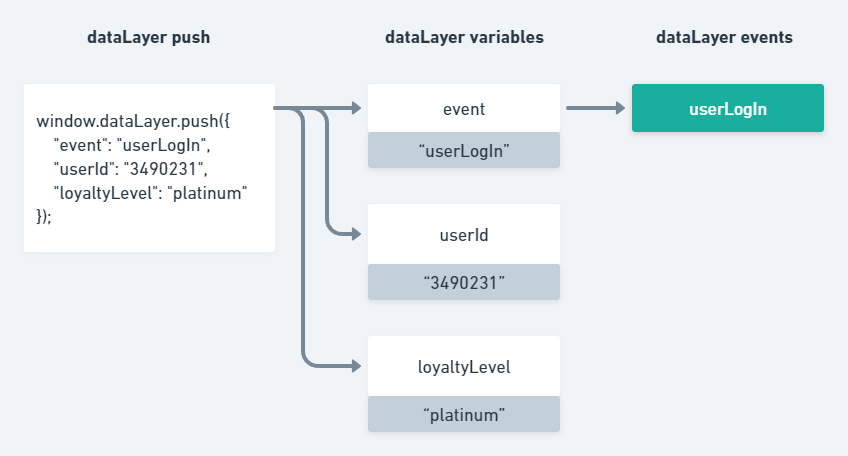
From the example provided above – “event”, “userId” and “loyaltyLevel” are all dataLayer variables.
Trigger GTM tags based on dataLayer events
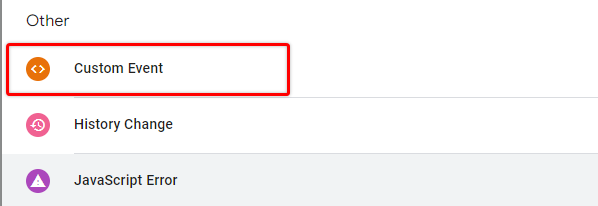
When you have dataLayer in place it’s very simple to trigger tags based on the provided event name.
- When creating a trigger select type “Custom Event”.
Provide the same event name (case sensitive) that was used in the dataLayer push. In the example I showed above I had “userLogIn”, so I need to add the same exact value for this trigger to work.
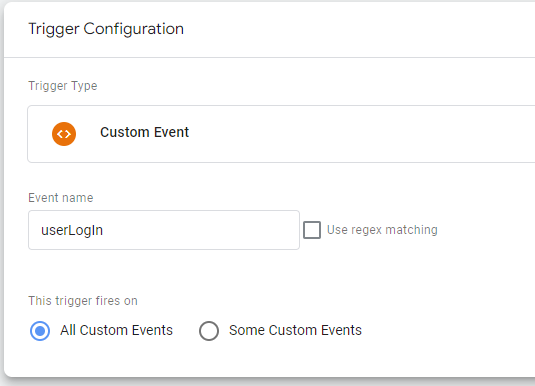
Note that if the value provided here is slightly different, for example, “userlogin” or “UserLogin” then the trigger won’t work.
Extract dataLayer contents in Google Tag Manager
Data Layer variable
To extract any values from dataLayer you will need to create a new user-defined variable per each field that you want to extract.
- In the variable section create a new user-defined variable with the type “Data Layer Variable”.
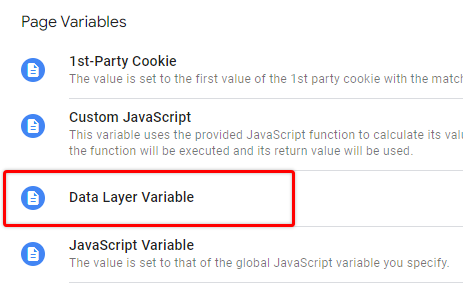
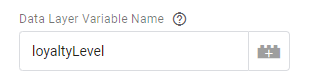
- Provide variable name, which will be the same as in the code. In my example, I had “userId” and “loyaltyLevel”. I will add userId first.
- Leave “Data Layer Version” as default V2.
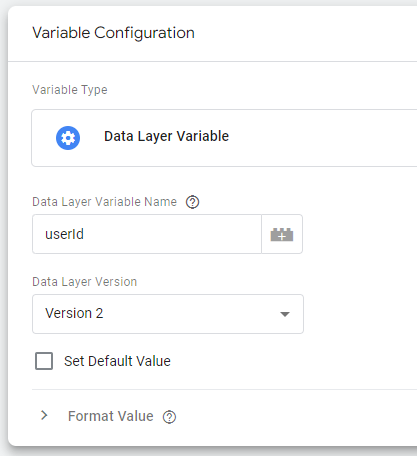
- Give it a descriptive name, and save the variable.
- Do the same for all of the variables that you have added in dataLayer.
Note that same as with event name, dataLayer variables are
Reference a nested variable from dataLayer
dataLayer may contain nested structures such as arrays and objects, for example:
window.dataLayer.push({
  "event": "userLogIn",
  "userAttributes": {
    "userId": "3490231",
    "loyaltyLevel": {
      "levelCount": 4,
      "levelName": "platinum"
    }
  }
});
In this case, providing “userId” or “loyaltyLevel” as a variable name won’t work since those variables are not available on the first level of the object.
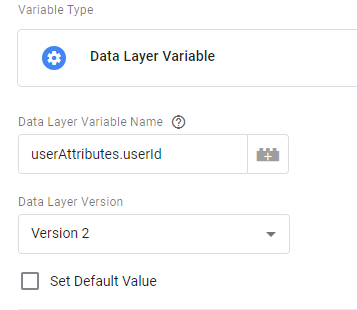
To fetch any nested variables from another object we will use dot notation, the same as in JavaScript.
To get a user ID I will have to use “userAttributes.userId”. userAttributes is the first level variable that contains userId, so those are divided using a dot. This variable will now return “3490231” as expected.
The same approach will apply to the loyalty level name – “platinum”, but in this case, we have to go one level deeper. To fetch the value of “platinum” I will use “userAttributes.loyaltyLevel.levelName”.
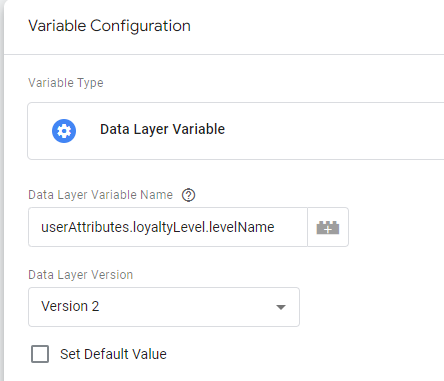
This way you can reference any dataLayer variable in a nested object.
Use Data Layer variables in tag settings
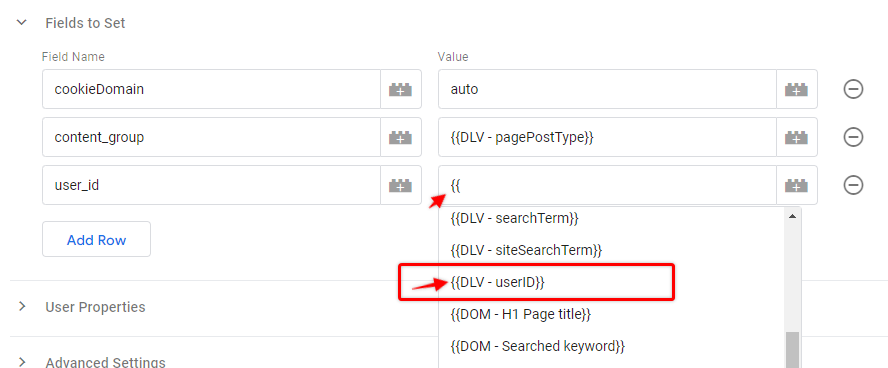
Once you have created dataLayer variables you can reference them in tag settings and in any other settings that allow you to select dynamic values.
For example, If I would want to pass user loyalty level and ID to Google Analytics 4 as an event, I would reference those in event parameter fields by clicking “+” icon or just typing {{ and select variable name.
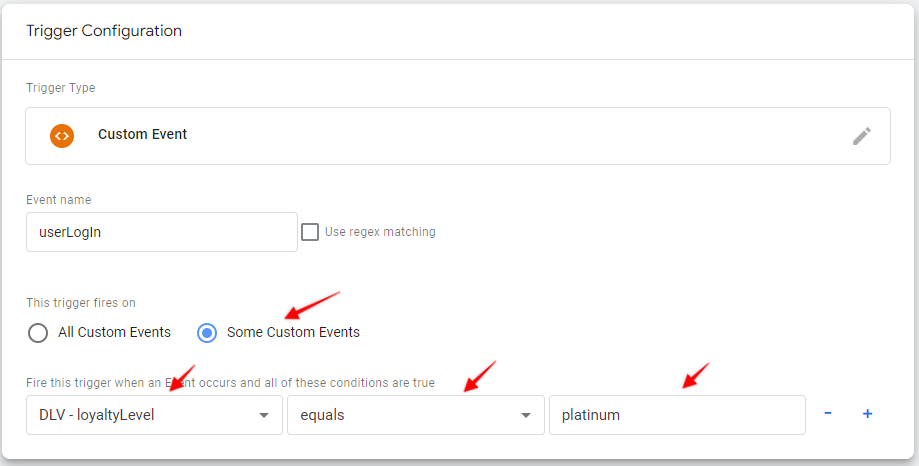
Use data layer variable contents as trigger conditions
As with any other variable, you can use data layer values to add filters to your triggers. For example, to limit “userLogIn” event only to “platinum” members:
- Change trigger firing condition to “Some Custom Events”.
- Select loyalty level data layer variable.
- Set condition to equals “platinum”.
Process of implementing dataLayer on your website
As I mentioned above, most likely you will need developer help to implement dataLayer properly on your website. But before doing any changes you would need to understand how this data will be used and what exactly you need.
Here is my high-level checklist on what needs to be done to successfully implement working dataLayer on the website:
- Have a clear understanding of THE PURPOSE.
You need to clearly define WHY you need additional data and WHEN it should be available.
Based on the purpose, an implementation might be slightly different.
Are you trying to implement a global data object with additional information or is it an event happening on particular action? How this data will be used? What vendors will use this data?
- Get DOCUMENTATION from your vendors.
Each marketing tech or analytics provider will have its own requirements for data format, field naming, and contents. Make sure you review all available documentation to include all required data in the data layer in the specified format.
- Define precise REQUIREMENTS for developers.
It is very important to list all the fields and data examples that you would expect to see in a data layer. Developers often are not aware of how this data will be later used in GTM and other tags, so it’s your job to provide as much detail and context as possible. It’s often a good idea to go through requirements together and clarify any blind spots before any development has started.
- TEST data layer implementation.
After the data layer is available for testing, go through all fields and possible scenarios to make sure you are receiving the expected data.
- Create & test SETUP IN GTM.
The last and most satisfying step (assuming that the data layer works properly) is to create a configuration in GTM based on newly available values.
Next steps
In this post, I tried to quickly cover the main concepts of data layer in GTM without diving too deep into edge cases. We have covered how to create dataLayer, what are the main components, how to trigger events based on data layer content, and how to extract dynamic values.
If you have any questions or suggestions on how to make this post more useful feel free to ask in the comments!

This is great article! That puts it very clearly everything about dataLayer/GTM! Thank you very much!