Element swipe tracking in GTM and GA4
Some website elements are interacted differently on mobile devices than on desktops. The most common example would be a product image slider – where on desktop it’s switched using arrows or navigation buttons, but on mobile visitors usually just swipe the screen.
In this post, I will share one way how we can track slider swipe events in GTM and GA4. Since those event types are not available by default we will use a bit of JavaScript.
Set up HTML tag to monitor swipe events in GTM
For swipe tracking to work we will need 2 tags in total. One will listen for swipe-related events and send a dataLayer event when a swipe occurs, and the second one will send an event when dataLayer receives this data.
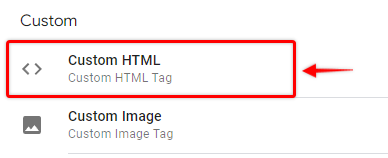
- In Google Tag Manager create a new tag with the type “Custom HTML”
- In the HTML field copy and paste the code template below, and we will go through how this works in a moment.
<script>
  (function(){
    // CSS selector of swipeable area - should be adjusted
    var elementSelector = '.wp-block-jetpack-slideshow_container.swiper-container';
    // data layer event name that will be triggered when swipe occurs
    var eventName = "sliderSwiped";

    // Do not edit anything below unless you know what you are doing

    var bannerContainer = document.querySelector(elementSelector);
    var isSwiping = false;

    if(bannerContainer) {
      bannerContainer.addEventListener("dragend", function(event) {
        sendEvent();
      }, false);

      bannerContainer.addEventListener("touchmove", function(event) {
        isSwiping = true;
      }, false);


      bannerContainer.addEventListener('touchend',  function(event) {
        if(isSwiping) {
          sendEvent();
        }

        isSwiping = false;

      }, false);
    }


    function sendEvent() {
      dataLayer.push({
        'event': eventName
      });
    }

  })();

</script>
On the top, you will see 2 variables that you can and should adjust before launching LIVE.
- elementSelector – This variable should contain the CSS selector of a swipeable area of your slider. It will be used by a script to trigger an event whenever this area is “swiped”.
- eventName – Optionally you can adjust the data layer event name that will be used when a swipe occurs. The default event name is “sliderSwiped”.
How to get CSS selector of slider swipeable area?
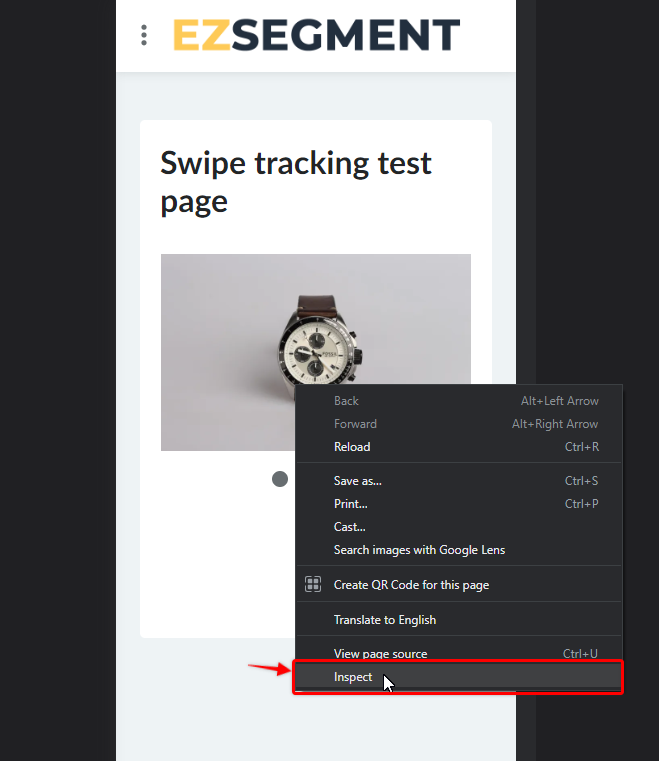
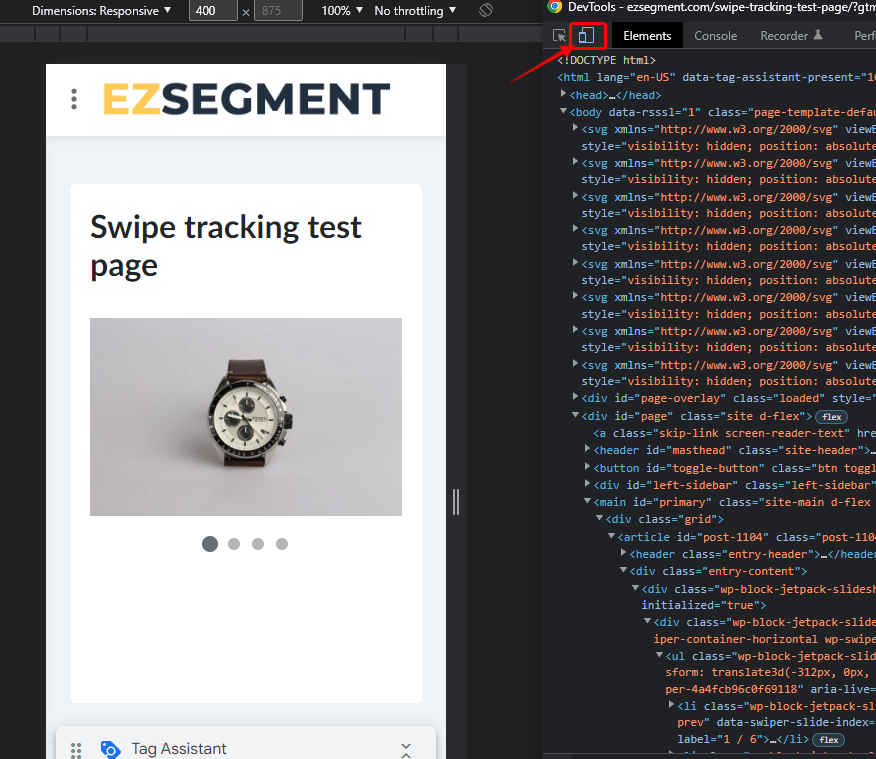
In Chrome (or frankly in most of the browsers) open a page with a slider where you want to track swipes and right-click on the slider. From the dropdown menu select “Inspect”.
The Dev Tools menu will appear highlighting an element from your image slider.
Find the closest slider parent element which represents the swipeable area, usually, it has descriptive class names like “swipe-area”, “swipe-container”, etc.
As you can see in the example below, my slider swipeable area block has classname “swiper-container”. If you are not sure which one is the right to use, you can test multiple selectors and test if it works.
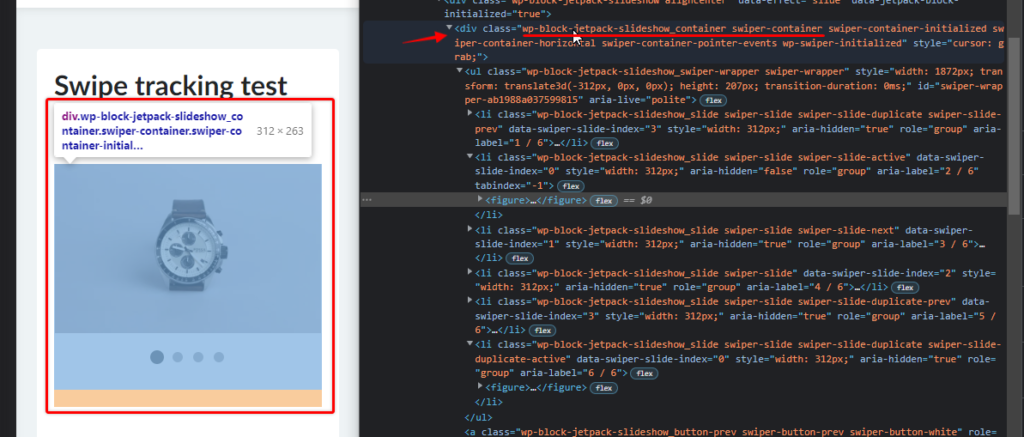
In my example full CSS selector that I will use – “.wp-block-jetpack-slideshow_container.swiper-container”. I’m dividing class names with a dot as per standard CSS selector notation.
Once you have yours, just replace elementSelector variable value.
var elementSelector = '.wp-block-jetpack-slideshow_container.swiper-container';NB! It’s important to have quotes around your selector value otherwise this script won’t work. You can read more about how strings work in JavaScript here.
How to use different event name for swipe tracking
To use a different event just replace “sliderSwiped” with the value you want to use. Note that it also should be in quotes.
var eventName = "sliderSwiped";This value is used in the sendEvent() method to trigger data layer push.
function sendEvent() {
  dataLayer.push({
    'event': eventName
  });
}
If you haven’t worked with data layer before I recommend checking one of my previous posts – Introduction to data layer in GTM for beginners.
How remaining parts of the script work
The main part that determines a swipe is pretty straightforward and it’s not the most advanced solution out there but it does the trick.
After the 2 settings variables, we fetch provided element based on provided CSS selector and set the current swipe status to “false”. It helps to limit event count so it’s not triggered multiple times while you as still in the process of swiping a finger over the slider.
var bannerContainer = document.querySelector(elementSelector);
var isSwiping = false;
Then we check if provided element actually exists on the page.
if(bannerContainer) {Then we are adding 3 event listeners to bannerContainer to determine when the swipe event should be triggered. Once “touchend” or “dragend” events occur – the dataLayer event is triggered.
bannerContainer.addEventListener("dragend", function(event) {
  sendEvent();
}, false);

bannerContainer.addEventListener("touchmove", function(event) {
  isSwiping = true;
}, false);


bannerContainer.addEventListener('touchend',  function(event) {
  if(isSwiping) {
    sendEvent();
  }

  isSwiping = false;

}, false);
Adding a trigger to your HTML tag
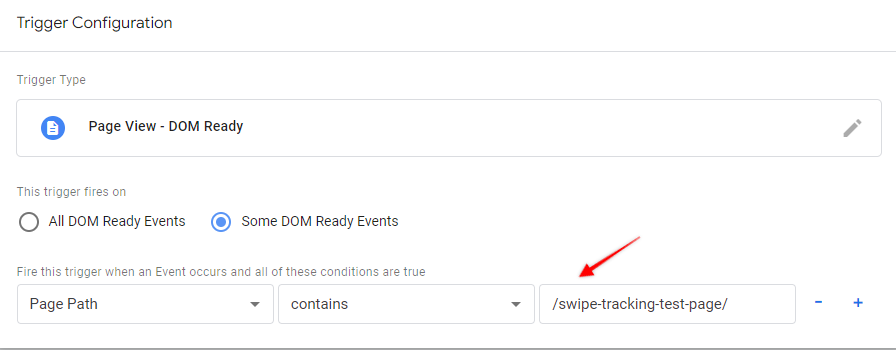
All we need to do here is to add a trigger to launch this tag on the appropriate page with a slider.
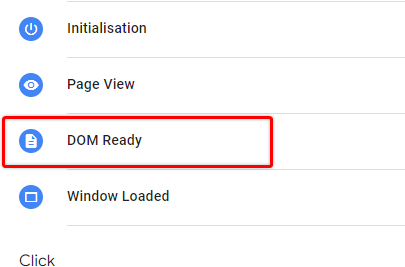
Create a new trigger with the type – DOM Ready.
And provide the page path condition where your slider is located.
Now save the tag, and let’s create a GA4 event as well while we are in GTM.
Create tag for swipe events in GTM
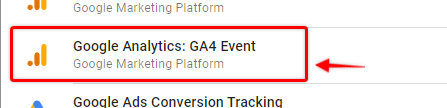
Once the HTML tag was saved you can create an additional GA4 Event tag that will capture swipe events into your reports.
Pick a configuration tag and add an event name. I will use “slider_swipe”, you can pick any other.
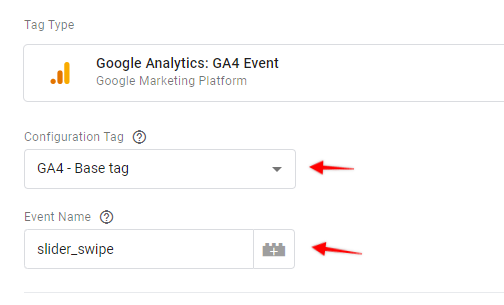
NB! If you don’t see any GA4 configuration tag options it means you don’t have GA4 installed in GTM. Please refer to this guide on how to add the GA4 tag in GTM.
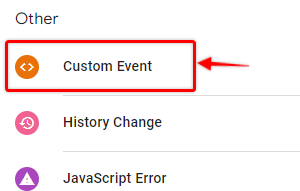
From the triggering menu, we need to create a new Custom Event trigger that we have used in the previous HTML tag.
Open the trigger selection menu and click “+” to add a new trigger.

Select “Custom Event” from the trigger type.
Provide the same event name used in the HTML tag eventName variable. “sliderSwiped” in my example.
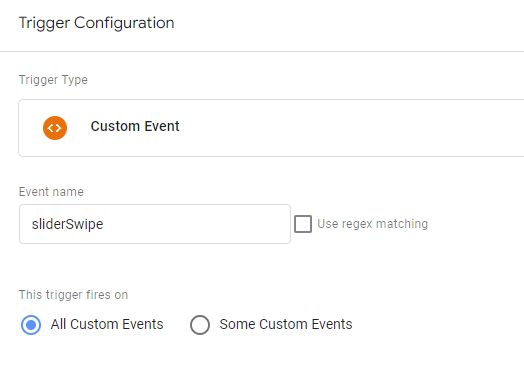
Once a new trigger is added to your tag give it a descriptive name and save it.
Test if the swipe event works as expected
Enable preview mode in GTM and provide a page with a slider on it for debugging.
Open the developer console (F12 in Chrome) and enable the device toolbar. Select any mobile device to imitate swipes.
Do a few image swipes and open the Tag Assistant tab/window.
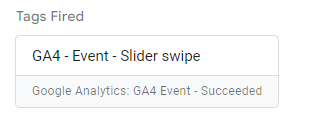
If HTML tag works as expected, you should see your dataLayer event appear in the summary event list.
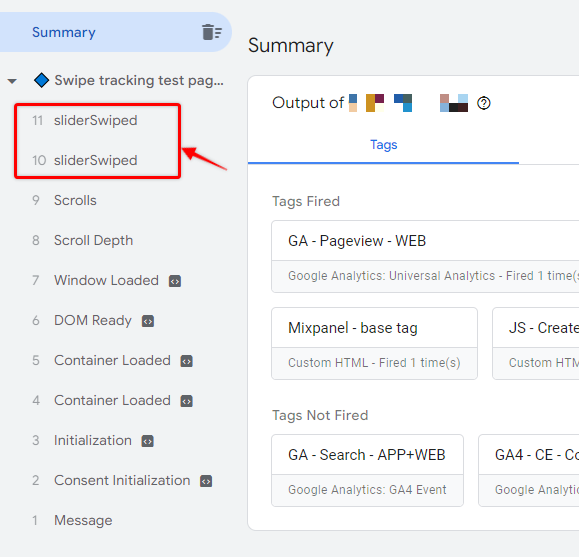
When clicked our newly created GA4 tag should be visible under the “Tags Fired” section.
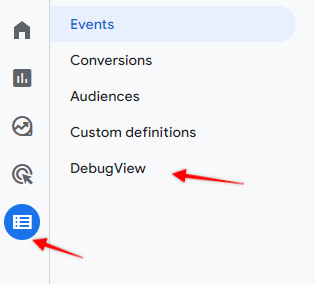
Now in the GA4 property go to Configure > DebugView.
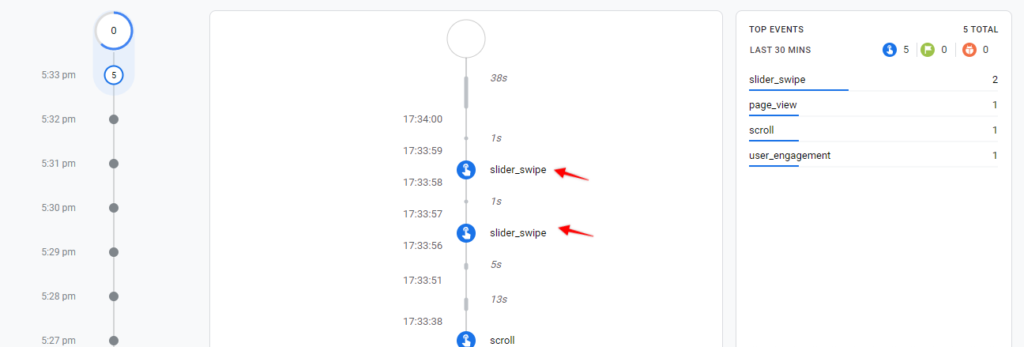
You should see a slider_swipe event name in the event timeline.
After you have launched your container LIVE aggregated swipe event data will be available in the Engagement > Events section same as other GA4 events.
Summary and next steps
In this post, we have reviewed one of the options on how you could create swipe tracking in GTM and GA4. Currently provided template script tracks user swipes in all directions, so if you would want to limit that only to capture left/right (for example), then you would need to do additional improvements in the javascript template.
Also, this template won’t work properly if you have swipeable elements inside other slider blocks, for example, swipeable product cards that have a swipeable slider inside of them. Additional adjustments would need to be made in JavaScript code to track those scenarios correctly.
I hope you will find it useful for your own slider tracking!

Thanks for the article.
How can I check if it is working?
I mean, how can I make the tag manager debug view on mobile?
Good question. You can try sharing preview mode link from GTM and open that from your mobile device. Then you should be able to see your interactions in DebugView from GA4 (pick another device from dropdown).
Hi, This is really helpful! but is there a way for a desktop page? coz it only works for mobile.
Hey,
There are usually no touch events on a desktop device (unless it has a touch screen), so if you would like to apply this for the mouse cursor then it would require far more complex logic (especially if you want to track gestures). I don’t have a ready template for such use cases but you could start by exploring Drag events on MDN, and then adjusting the JavaScript logic based on that. https://developer.mozilla.org/en-US/docs/Web/API/DragEvent
Hi Aashna,
Of course, just pick the tag type “Google Analytics: Universal Analytics” and then select the Track type – “Event”.
Then you just provide event details that you want to see in Universal Analytics (category, action, label) and use the same sliderSwipe trigger that is mentioned in the article.
In a similar way, using the same trigger, you can send swipe events to any other vendor if needed – Facebook, Hotjar, etc.
This is really helpful! Is there a way to use Universal Analytics instead of GA4?